 Save to Pinterest
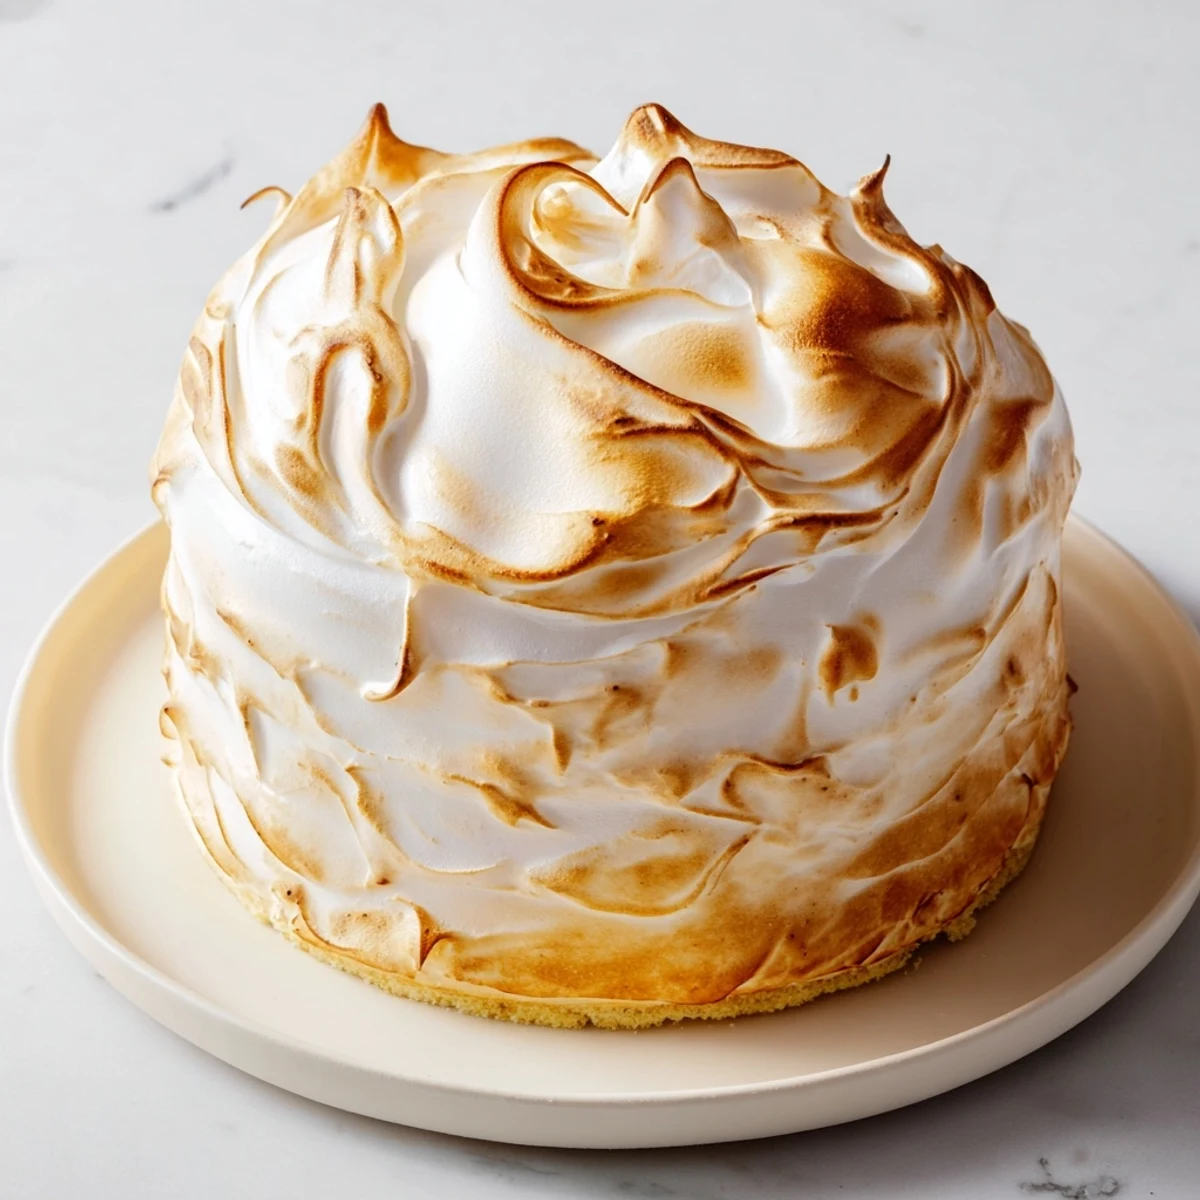
 Baked Alaska showcases a round sponge cake base topped with a dome of softened vanilla ice cream. The ice cream is encased in silky meringue that is whipped to stiff peaks and toasted to a golden finish either in a hot oven or with a kitchen torch. Preparation requires freezing the ice cream dome for hours to maintain structure, followed by a brief bake to achieve a billowy, toasted exterior. This dessert offers a delightful balance of cold and warm textures with creamy, fluffy, and crunchy elements. It’s perfect for celebrations and can be customized by varying ice cream flavors or adding fruit sorbet layers.
The first time I made Baked Alaska, I was determined to prove I could pull off something theatrical without burning the house down. My grandmother used to talk about watching hers come out of the oven with that golden, torched meringue like edible clouds, and I wanted to recreate that magic. What I didn't expect was how meditative the whole process would feel—the quiet focus of building layers in a bowl, the satisfying stiffness of perfectly beaten egg whites, and then that breathless moment when you torch the meringue and watch it transform into something almost too beautiful to eat.
I'll never forget my friend Sarah's face when I served this at her birthday dinner. She thought I'd spent all day cooking, but really most of the heavy lifting happened the day before while I was just puttering around. The toasted meringue peaked perfectly under the torch, and when she cut into it, that first spoonful had everything—cold, warm, sweet, creamy, crispy all at once. She asked for the recipe that night, and now she makes it for every special occasion.
Ingredients
- Sponge cake layer (20 cm / 8-inch round, about 2 cm / ¾-inch thick): This is your foundation, and it needs to be sturdy enough to support the ice cream dome without falling apart, so a proper sponge cake with some structure works best.
- Vanilla ice cream, 1 liter (about 4 cups), slightly softened: Softened ice cream packs more smoothly into the bowl and melds better with the cake, but if it's too soft it won't hold its shape, so let it sit out for just 5-10 minutes.
- Egg whites, 4 large, at room temperature: Room temperature whites whip higher and create a more stable meringue, which is essential when you're about to torch it.
- Granulated sugar, 200 g (1 cup): Add it gradually to the whipping whites so the sugar dissolves completely and you get that glossy, stiff peak texture rather than grainy peaks.
- Cream of tartar, ¼ tsp: This acidic ingredient stabilizes the egg whites and helps them reach higher peaks without as much beating.
- Vanilla extract, 1 tsp: It's the finishing touch that rounds out the sweetness and adds depth to the meringue.
Instructions
- Set Up Your Ice Cream Dome:
- Line a 20 cm bowl with plastic wrap and pack in the softened ice cream, smoothing the top as you go. This creates your dome, which needs to be absolutely firm before you move it, so freeze it for at least 4 hours or overnight.
- Layer Your Base:
- Place the cake on a parchment-lined baking sheet and carefully unmold the frozen ice cream dome onto it, peeling away the plastic wrap. Pop it back in the freezer while you make the meringue, because you want everything as cold as possible when the meringue goes on.
- Build Your Meringue:
- In a completely clean, dry bowl, beat the egg whites with cream of tartar until soft peaks form, then gradually add the sugar while beating until you have stiff, glossy peaks that hold their shape. Finish with vanilla extract for that subtle sweetness.
- Prepare for the Heat:
- Preheat your oven to 230°C (450°F), or if you prefer, have your kitchen torch ready and charged. Both methods work beautifully, though the torch gives you more control over the color.
- Encase Everything:
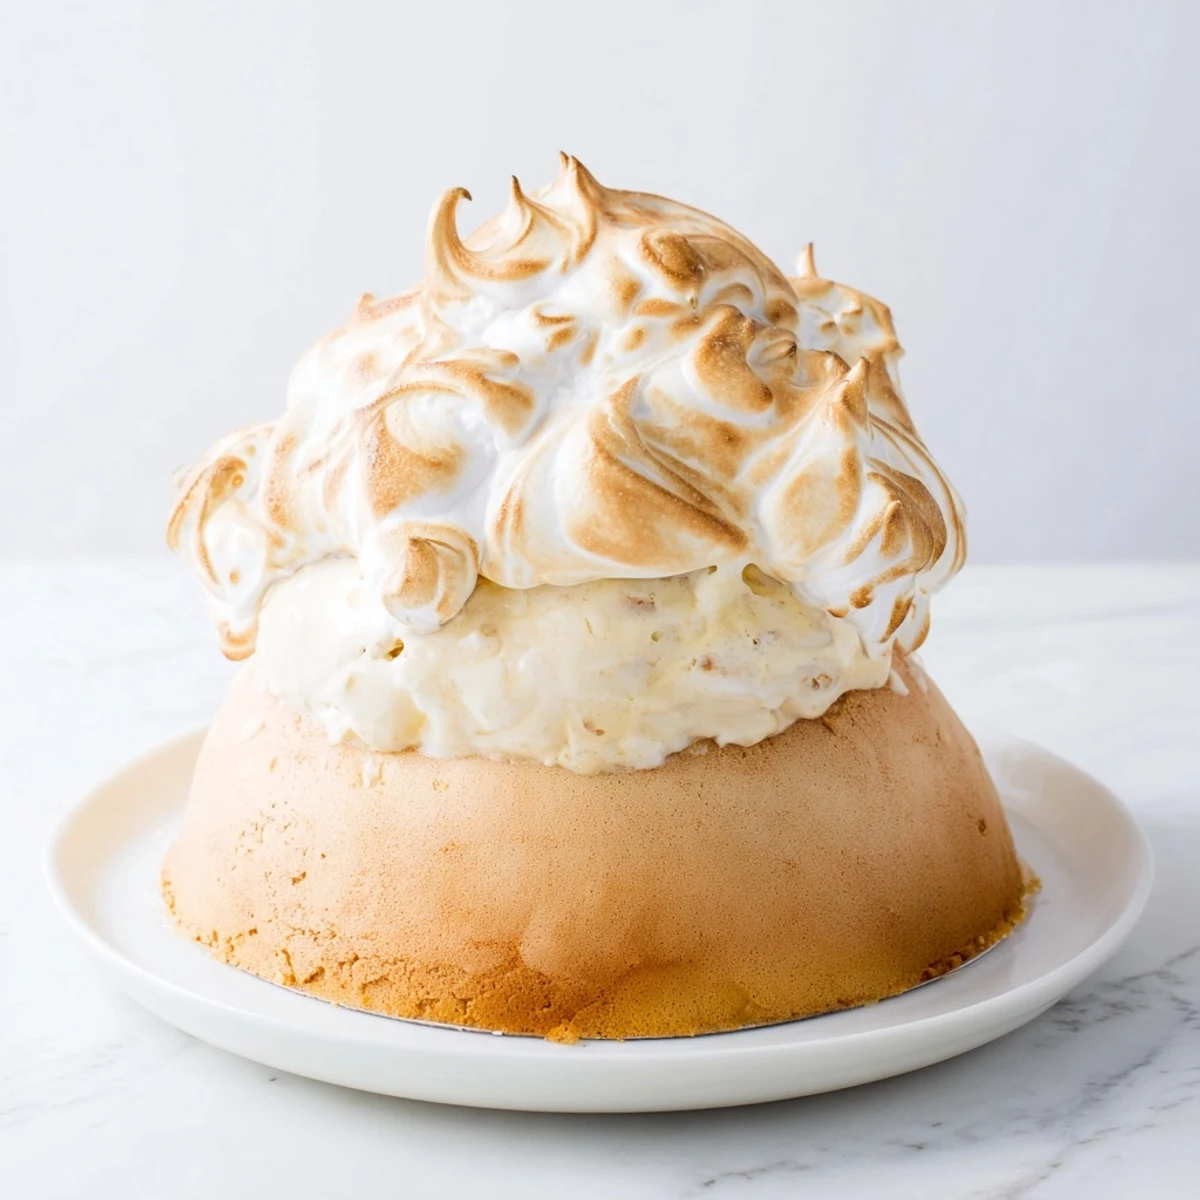
- Working quickly now, spread that fluffy meringue over the ice cream and cake, making sure you seal every edge completely so no ice cream peeks through. Don't be shy about swirling it decoratively—those peaks will toast to golden perfection.
- Toast to Golden:
- Bake for 3-5 minutes in the hot oven until the meringue turns golden brown, or torch it in swooping motions until you reach that caramelized color. Either way, you're aiming for that beautiful contrast between creamy white and toasted gold.
- Serve Immediately:
- Slice with a sharp knife (dip it in hot water between slices for clean edges) and serve right away while the meringue is still warm and the ice cream is still cold.
 Save to Pinterest
 There's something almost ceremonial about Baked Alaska that reminds me why I love cooking for people in the first place. It's not just about the technical skill or the flavor—it's that moment of shared wonder when something this dramatic comes together. I've made it now for anniversaries, celebrations, and random Tuesday nights when I wanted to feel like I was doing something extraordinary in the kitchen.
Flavor Variations Worth Trying
Once you've nailed the classic vanilla version, you can start playing with flavors without changing the core technique at all. Strawberry or pistachio ice cream gives you a lovely color surprise when you slice into it, and a dark chocolate cake base with coffee ice cream creates this sophisticated depth that makes people pause mid-bite. I've even layered in a thin stripe of sorbet—lemon or raspberry—between the ice cream and cake for brightness, and it keeps things from feeling too heavy.
Cake and Base Swaps
The sponge cake is traditional, but your pantry probably has other options that work just as well. Pound cake gives you a denser, richer base that holds up beautifully, brownies create this almost decadent chocolate-forward moment, and even store-bought options work if you're short on time. Just make sure whatever you choose is sturdy enough to support the ice cream dome without getting soggy—the parchment paper under everything helps with that.
The Torch Versus Oven Question
Both methods work, but the kitchen torch gives you more precision and usually better color control, since you can see exactly where the meringue is browning and adjust as you go. The oven is faster and less hands-on if you're nervous about torch work. My personal trick is to use both—a quick blast in the hot oven for speed, then a light torch pass over the peaks for that extra caramelization and control.
- If you go full torch route, work in small sections and keep the flame moving so you don't scorch one spot while another stays pale.
- With the oven method, check around the 3-minute mark because ovens vary wildly, and golden brown happens fast at that temperature.
- No matter which method you choose, practice on a smaller batch first if you're new to either technique.
 Save to Pinterest
 Baked Alaska is the kind of dessert that lives in that perfect space between impressive and actually doable, which is why I keep coming back to it. If you've ever wanted to cook something that feels almost restaurant-level but doesn't require you to be a pastry chef, this is your moment.
Recipe Questions & Answers
- → How do you keep the ice cream from melting during preparation?
-
Freezing the ice cream dome solidly before applying meringue and baking in a very hot oven or quickly toasting with a kitchen torch helps maintain the cold center while browning the meringue.
- → What type of cake works best as the base?
-
A light sponge cake is ideal as it supports the ice cream without overpowering delicate flavors. Alternatives like pound cake or brownies can add richness and texture variety.
- → Why is cream of tartar added to the meringue?
-
Cream of tartar stabilizes the egg whites, helping to achieve stiff, glossy peaks that hold their shape when spread over the ice cream.
- → Can other ice cream flavors be used?
-
Yes, swapping vanilla for fruit sorbet or other ice cream flavors enhances variety and complements the meringue’s sweetness.
- → What is the best method to brown the meringue?
-
Either briefly baking in a very hot oven or using a kitchen torch both achieve a golden, toasted meringue finish without melting the ice cream.
