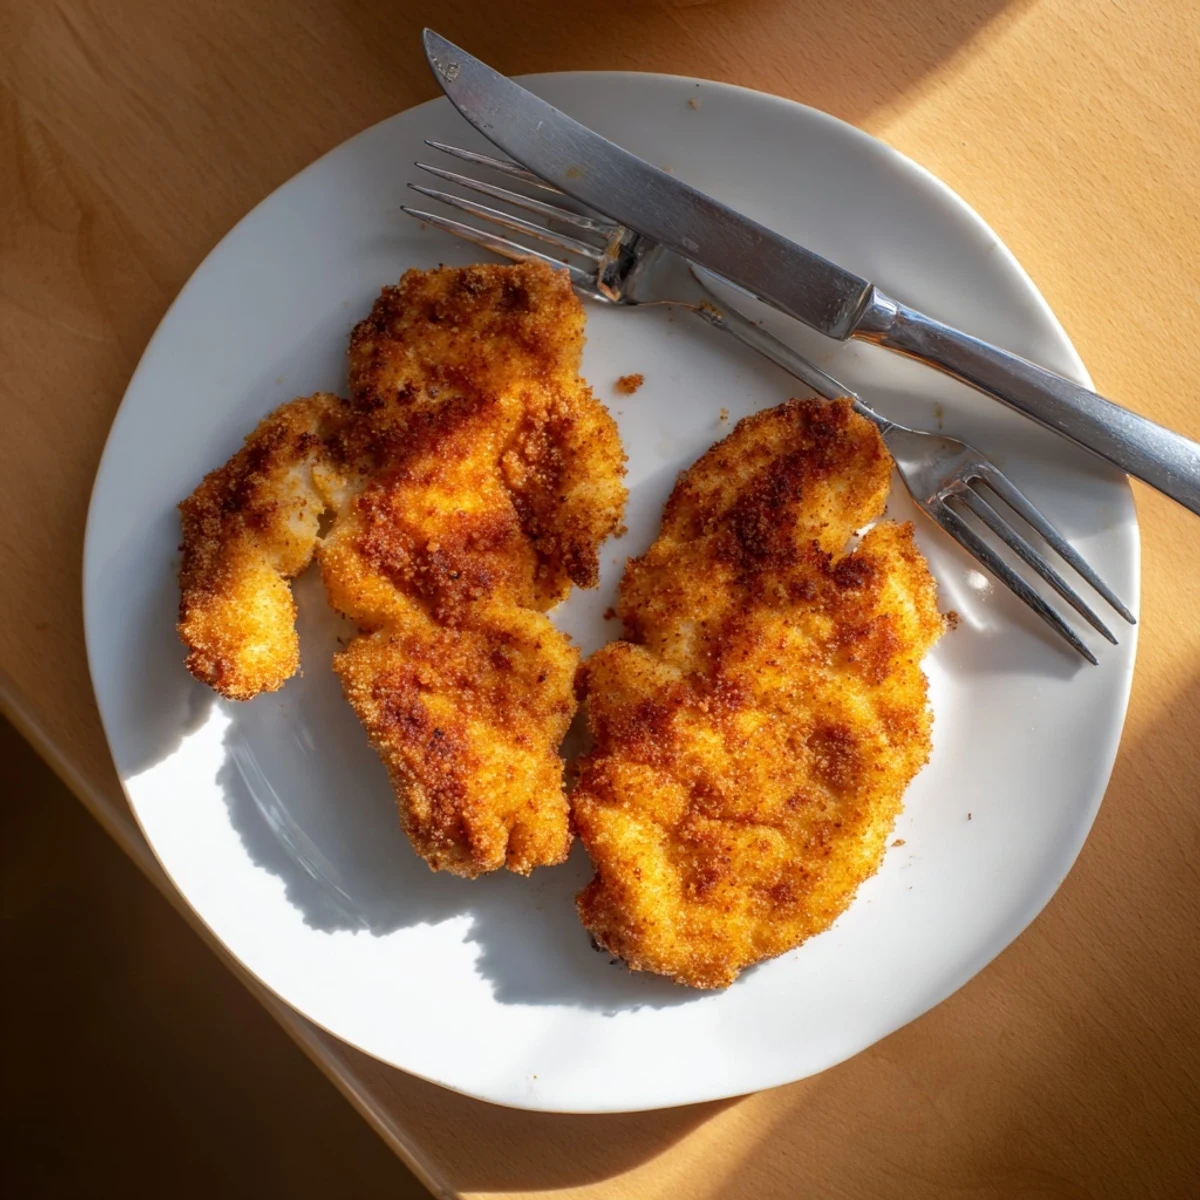
 Save to Pinterest
 Create restaurant-style crispy chicken breasts at home with this simple technique. The buttermilk marinade ensures the meat stays incredibly tender and juicy, while the seasoned flour coating develops that signature golden crunch everyone loves.
Fry to perfection in just 15 minutes for a comforting main dish that pairs beautifully with classic sides. The secret is pounding the chicken to even thickness so everything cooks uniformly, then letting the pieces rest before serving to lock in those delicious juices.
The sound of oil popping in a cast iron skillet is my version of a Sunday morning alarm clock, warm and insistent and impossible to ignore. My grandmother never wrote this recipe down because she said fried chicken was something you feel in your hands, not read on a page. She was right about most things in the kitchen, and especially right about this.
One rainy Tuesday I decided frying chicken would fix my mood, and I was not wrong. My roommate walked in, stood in the kitchen doorway, and said nothing for a full minute before whispering that it smelled like her childhood. We ate standing over the counter with paper towels instead of plates.
Ingredients
- 4 boneless, skinless chicken breasts: Pounding them even is the single most important step, because uneven chicken means dry edges and raw centers, and nobody wants that surprise.
- 1 cup buttermilk: This is your secret weapon, tenderizing the meat while adding a subtle tang that nothing else can replicate.
- 1 teaspoon salt and 1/2 teaspoon black pepper for marinade: Seasoning the buttermilk itself layers flavor into every bite rather than just sitting on the surface.
- 1/2 teaspoon garlic powder: A quiet background note that makes everything taste more like itself without announcing it is there.
- 1 1/2 cups all-purpose flour: The foundation of your crust, so make sure it is fresh and lump free before you start dredging.
- 1 teaspoon paprika: Adds a warm color and a gentle sweetness that balances the heat beautifully.
- 1/2 teaspoon cayenne pepper: Just enough warmth to make your lips tingle without overpowering anyone at the table.
- 1 teaspoon onion powder: Rounds out the savory profile of the breading in a way that salt alone never could.
- 1 teaspoon salt and 1/2 teaspoon black pepper for breading: Do not skip this second round of seasoning, because the flour needs its own flavor to carry the crust.
- Vegetable oil, about 2 cups for frying: You want enough oil to come halfway up the chicken so it fries evenly without needing to flip more than once.
Instructions
- Flatten the chicken:
- Slide each breast between two sheets of plastic wrap and use a meat mallet or rolling pin to gently pound them to an even half inch thickness, working from the center outward so nothing tears.
- Make the buttermilk bath:
- Whisk together the buttermilk, salt, pepper, and garlic powder in a bowl big enough to hold all four breasts comfortably, then submerge the chicken and turn it so every surface is coated.
- Let it rest and soak:
- Cover and refrigerate for at least thirty minutes, though overnight is even better if you can plan ahead, because patience here pays off in tenderness you can actually taste.
- Build the seasoned flour:
- In a wide shallow bowl, stir together the flour, paprika, cayenne, onion powder, salt, and pepper until the color is even throughout with no pale streaks of plain flour hiding in corners.
- Heat the oil:
- Pour oil into a large skillet and set it over medium high heat until it reaches 350 degrees, which you can test with a small pinch of flour that should sizzle immediately but not violently.
- Dredge with intention:
- Lift each breast from the buttermilk, let the excess drip off for a second, then press it firmly into the flour on both sides, really working the coating into every crevice with your fingers.
- Fry to golden perfection:
- Carefully lay the chicken into the hot oil and fry for six to seven minutes per side until the crust is deeply golden and the internal temperature reads 165 degrees, working in batches if needed so the pan does not crowd.
- Rest before serving:
- Transfer the chicken to a wire rack or paper towel lined plate and let it sit for five minutes so the juices redistribute and the crust sets instead of steaming itself soft underneath.
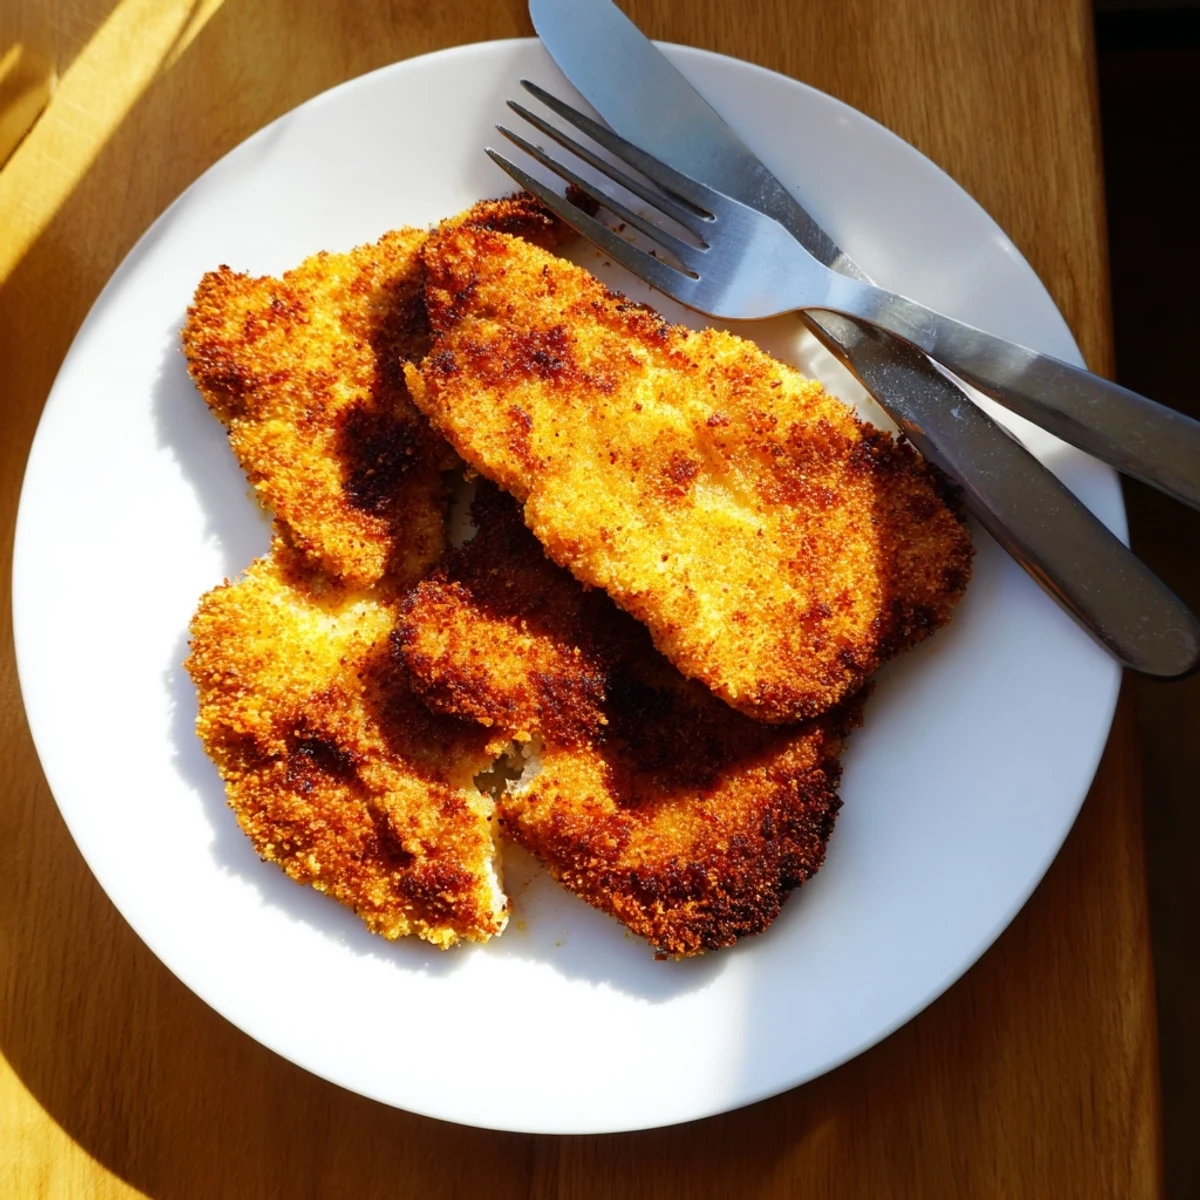 Save to Pinterest
 The first time I served this to my partner she closed her eyes after the first bite and I knew I had won something that could not be articulated in words. Food does that sometimes, says the things your mouth cannot figure out how to form.
What to Serve Alongside It
Mashed potatoes and coleslaw are the classic companions for a reason, because the creamy and the tangy balance the richness of the fried crust perfectly. A squeeze of honey over the top sounds strange until you try it and realize salty and sweet were always meant to be together on this plate.
Making It Gluten Free
Swap the all purpose flour for a one to one gluten free blend and check every label on your seasoning bottles, because hidden gluten lurks in places you would never expect. The texture will be slightly different but still deeply satisfying when the craving hits and you need a version that works for everyone at your table.
Storage and Reheating Tricks
Leftover fried chicken is best eaten cold straight from the refrigerator at midnight, standing in the glow of the open door, but if you insist on reheating it then skip the microwave entirely. An oven at 375 degrees for about ten minutes will bring back enough crunch to satisfy.
- Store leftovers in an airtight container in the refrigerator for up to three days.
- Never cover warm chicken tightly or steam will destroy what the fryer built.
- Freezing works in a pinch but the crust will never fully recover its original glory.
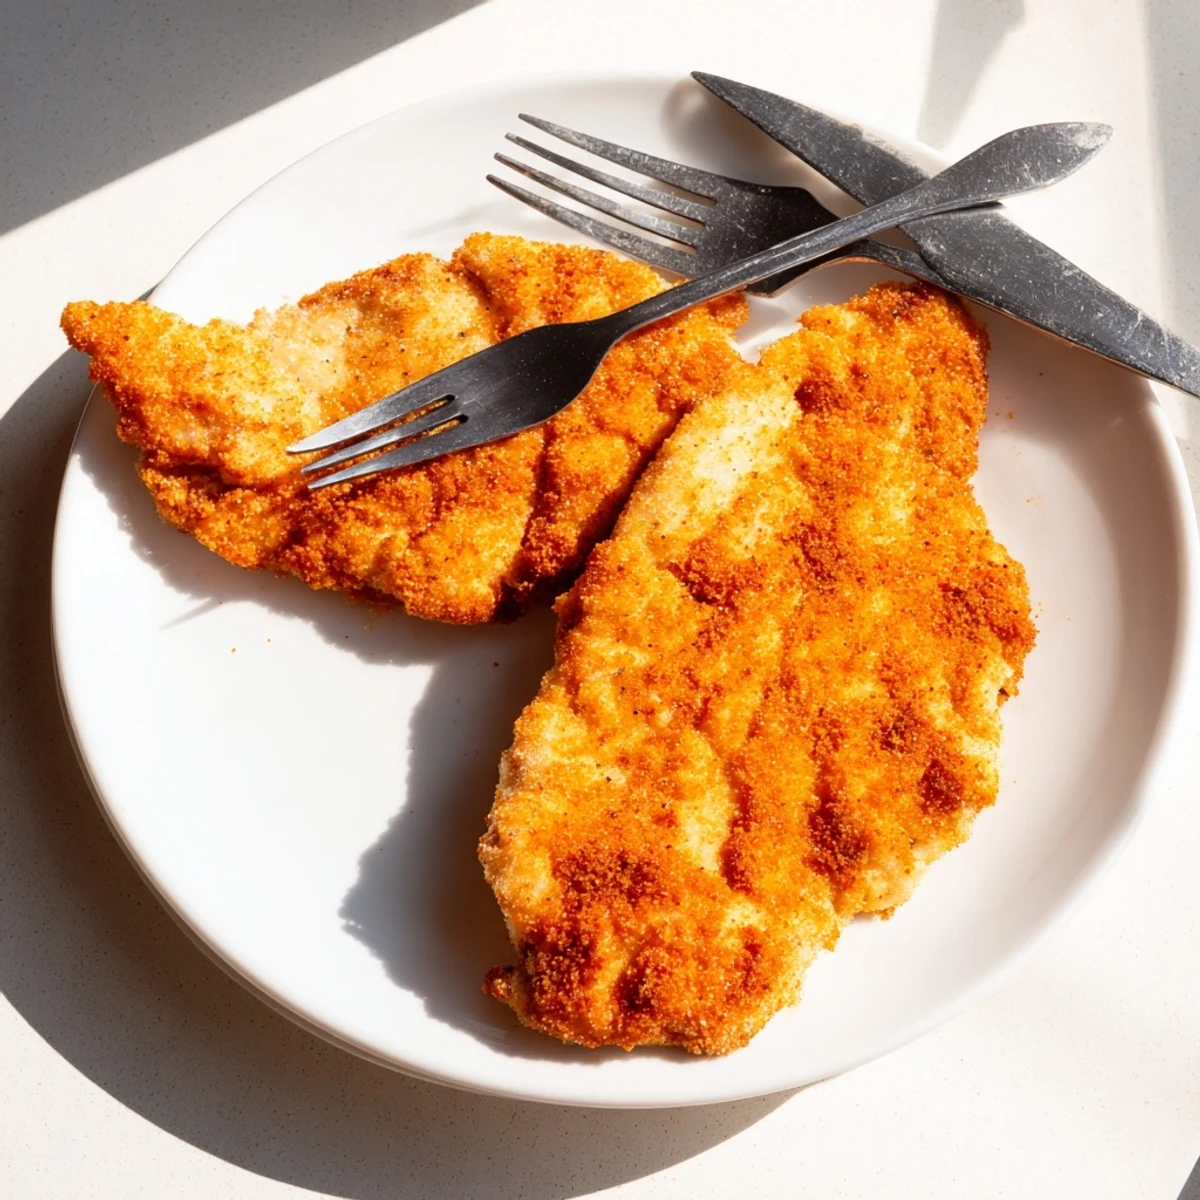 Save to Pinterest
 Some recipes become part of your rotation and some become part of your story. This one, with its golden crust and kitchen filling aroma, has a way of becoming both.
Recipe Questions & Answers
- → How do I get the coating to stick to the chicken?
-
The buttermilk marinade acts as a natural adhesive. Let excess liquid drip off before dredging, then press the flour mixture firmly onto each piece to ensure thorough coverage.
- → Can I use chicken thighs instead of breasts?
-
Absolutely. Thighs work wonderfully and often stay even juicier due to their higher fat content. Adjust cooking time to 8-10 minutes per side depending on thickness.
- → What oil temperature is best for frying?
-
Maintain your oil at 350°F (175°C). Too cool and the coating becomes greasy; too hot and the outside burns before the meat cooks through. Use a kitchen thermometer for accuracy.
- → Why do I need to pound the chicken?
-
Pounding creates uniform thickness, which ensures even cooking. Without this step, thinner sections dry out while thicker areas remain undercooked.
- → How long should I marinate the chicken?
-
Thirty minutes minimum provides good flavor and tenderness. For even better results, marinate up to overnight in the refrigerator—just remember to pat the pieces dry before breading.
- → Can I make this gluten-free?
-
Yes. Substitute the all-purpose flour with a 1:1 gluten-free flour blend and use dairy-free buttermilk alternative if needed. The frying technique remains exactly the same.
