 Save to Pinterest
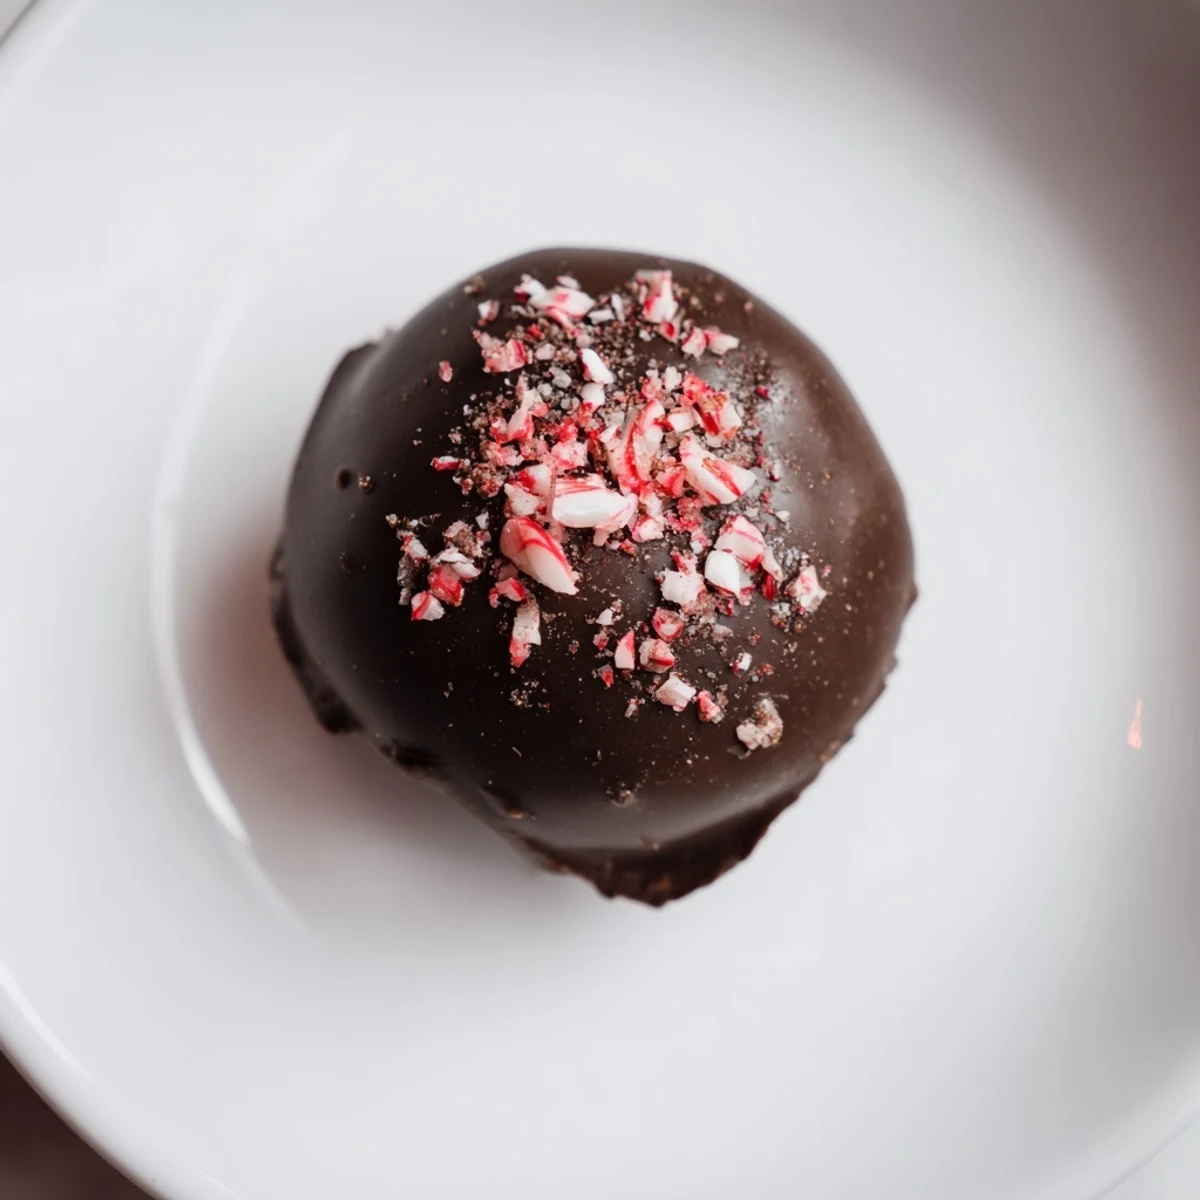
 These creamy chocolate confections combine smooth ganache infused with espresso and peppermint extract. After chilling, the ganache is shaped into small balls and coated in melted chocolate, then garnished with crushed peppermint candies. The result is a luscious treat with a balance of rich chocolate and refreshing mint notes, perfect for gifting or enjoying during celebrations.
I'll never forget the December afternoon when my aunt handed me a box of peppermint mocha truffles she'd made herself. The moment I bit into one—that snap of dark chocolate giving way to a creamy, espresso-kissed center with just a whisper of peppermint—I was completely enchanted. I spent the rest of that holiday season trying to recreate that magic in my own kitchen, and these truffles became my answer. Now, every time I make them, I'm transported back to that moment of pure joy, and I get to share that same feeling with everyone I gift them to.
Last Christmas, I made three batches of these truffles for my office party, and they disappeared before anything else on the dessert table. My coworker Tom came back for seconds and said, 'These taste like winter in chocolate form.' That phrase stuck with me. These aren't just treats—they're little moments of celebration wrapped in cocoa powder and peppermint.
Ingredients
- Semi-sweet chocolate (225 g): This is your ganache foundation, and finely chopping it ensures it melts evenly. Don't skip the chopping step—bigger chunks take longer to melt and can seize up on you.
- Heavy cream (60 ml): This is what makes the ganache silky and luxurious. Room temperature cream works best, though I've used it straight from the fridge in a pinch—just heat it a bit longer.
- Unsalted butter (2 tbsp): This adds richness and helps the ganache roll smoothly. Make sure it's genuinely softened, not melted, before you start.
- Instant espresso powder (1 tbsp): This deepens the chocolate flavor without making it taste like coffee. It's the secret ingredient that makes people wonder 'what is that amazing flavor?'
- Peppermint extract (1/2 tsp): This is potent stuff—I learned this the hard way by adding too much and having to start over. Start conservative and taste as you go.
- Vanilla extract (1/4 tsp): Just a whisper of vanilla rounds out the flavors and makes them taste more refined.
- Dark or milk chocolate for coating (200 g): Choose quality chocolate here if you can—it really shows in the final product. Dark chocolate gives a sophisticated edge, while milk chocolate appeals to more traditional tastes.
- Crushed peppermint candies (3 tbsp): This is your finishing flourish. Crush them just before using so they're still vibrant and crunchy.
- Coconut oil (2 tsp, optional): This thin the coating chocolate just enough to make dipping easier and gives a beautiful, glossy finish.
Instructions
- Prepare your chocolate base:
- Grab your heatproof bowl and add the finely chopped semi-sweet chocolate along with the instant espresso powder and a tiny pinch of salt. This is where the magic starts—the espresso powder will release its flavor as the chocolate melts, creating that mysterious depth.
- Heat your cream mixture:
- In a small saucepan, warm the butter and heavy cream together over medium heat. You're looking for that moment when steam just starts to rise and tiny bubbles form around the edges—not a rolling boil, just a gentle simmer. This takes about 3-4 minutes.
- Create the emulsion:
- Pour that beautiful hot cream right over your chocolate. Don't stir immediately—let it sit for a minute or two. This resting period lets the heat gently melt the chocolate. Then stir slowly and deliberately until you have a glossy, smooth mixture. It should look almost liquid and luxurious.
- Add the flavors:
- Stir in the peppermint and vanilla extracts. You'll notice the mixture will smell absolutely divine at this point. Give it a good stir to distribute the extracts evenly.
- Chill the ganache:
- Cover your bowl with plastic wrap and pop it in the refrigerator for 1-2 hours. You want it firm enough to scoop but not so hard you need superhuman strength. I usually check after 45 minutes and stir it gently—this prevents it from getting too dense.
- Roll your truffles:
- Line a baking sheet with parchment paper. Using a small ice cream scoop or a teaspoon, scoop out mounds of ganache. The key is working quickly but gently—if your hands are too warm, the ganache gets sticky. Roll each mound between your palms using quick, light motions until you have a rough sphere. Don't stress about perfection; rustic is charming.
- Quick freeze for stability:
- Once all your balls are rolled, pop the whole sheet into the freezer for 15 minutes. This firms them up just enough that they'll hold their shape when you dip them.
- Melt your coating chocolate:
- Place your chopped coating chocolate in a microwave-safe bowl. Microwave in 30-second bursts, stirring between each burst. This patience prevents the chocolate from overheating and becoming grainy. If you're using coconut oil, add it during the last burst when the chocolate is almost melted. Stop when there are still a few small pieces visible—residual heat will finish the job.
- Dip with finesse:
- Take a truffle and place it on a fork. Lower it into the melted chocolate, turning it gently to coat all sides. Let the excess drip back into the bowl—you want an elegant coat, not a thick shell. Slide the truffle back onto your parchment-lined sheet. Work fairly quickly so the coating chocolate stays fluid.
- Garnish immediately:
- Before the chocolate coating sets—and this is important—sprinkle crushed peppermint candies on top of each truffle. The coating needs to still be slightly tacky so the candy adheres. This is the moment where they go from nice to absolutely stunning.
- Final set:
- Leave them at room temperature for 30 minutes to an hour to set completely, or refrigerate them if you're in a hurry. The chocolate will firm up into that satisfying snap.
 Save to Pinterest
 I remember giving these truffles to my neighbor Mrs. Chen last year, and she came back to my door three days later asking if I'd made another batch. That's when I realized these little chocolate treats had become more than just dessert—they'd become a tiny gesture of genuine care and connection.
Storage and Gifting Ideas
These truffles keep beautifully in an airtight container in the refrigerator for up to a week, though honestly, they rarely last that long in my house. If you're thinking about gifting them—and you absolutely should—store them in a cute box lined with parchment paper or cupcake liners. They look like they came from an expensive chocolaterie, and your friends will be amazed that you made them yourself. I like to tuck a little handwritten note in the box mentioning the espresso and peppermint combination, just so people know what they're about to experience.
Flavor Variations to Explore
Once you've mastered the basic recipe, you can have so much fun playing with flavors. I've made versions with orange extract instead of peppermint, with a hint of lavender, and even with a dash of cayenne pepper for those who like heat. The beauty of this recipe is that the espresso-chocolate-cream base is so solid that you can swap the peppermint for almost any flavoring extract you love. Just remember to keep that 1/2 teaspoon rule and taste your ganache before rolling. You could also add a tiny pinch of finely ground sea salt on top before the chocolate sets for a sophisticated sweet-salty contrast. The possibilities are genuinely endless once you understand how the base works.
Perfect Pairings and Serving Suggestions
These truffles shine brightest when paired with something warm or cold that complements them. A shot of hot espresso is the obvious choice, but I've also loved serving them after dinner with a glass of red wine—the tannins play beautifully against the peppermint sweetness. For a cozy evening, try them with hot peppermint tea or even hot chocolate made with dark chocolate and a dash of espresso powder. On warmer days, they're wonderful straight from the refrigerator as an afternoon pick-me-up with a strong cup of tea. They also make an elegant addition to a dessert board alongside fresh fruit, nuts, and maybe some honeycomb candy.
- Serve these chilled straight from the fridge for the most satisfying snap and creamiest center.
- Make them ahead of time—they actually taste better after a day or two as the flavors meld together.
- If you're bringing them to a party or giving them as gifts, keep them in a cool spot until serving time so the chocolate coating stays glossy and beautiful.
 Save to Pinterest
 These peppermint mocha truffles have become my favorite way to celebrate the season, whether it's actually December or just a Tuesday when I want to feel a little festive. There's something deeply satisfying about creating something so beautiful and delicious with your own two hands.
Recipe Questions & Answers
- → What kind of chocolate is best for the ganache?
-
Semi-sweet chocolate finely chopped works best for a balanced sweetness that complements the espresso and peppermint flavors.
- → Can I use vegan alternatives in this preparation?
-
Yes, substituting coconut cream and vegan chocolate can create a dairy-free version with similar texture and taste.
- → How long should the ganache chill before shaping?
-
Chill the ganache for 1-2 hours until firm enough to scoop and roll into truffle balls.
- → What is the purpose of the espresso powder?
-
Espresso powder enhances the chocolate's depth, adding a subtle richness and balanced bitterness.
- → How can I store these confections?
-
Store in an airtight container in the refrigerator for up to one week to maintain freshness and texture.
