 Save to Pinterest
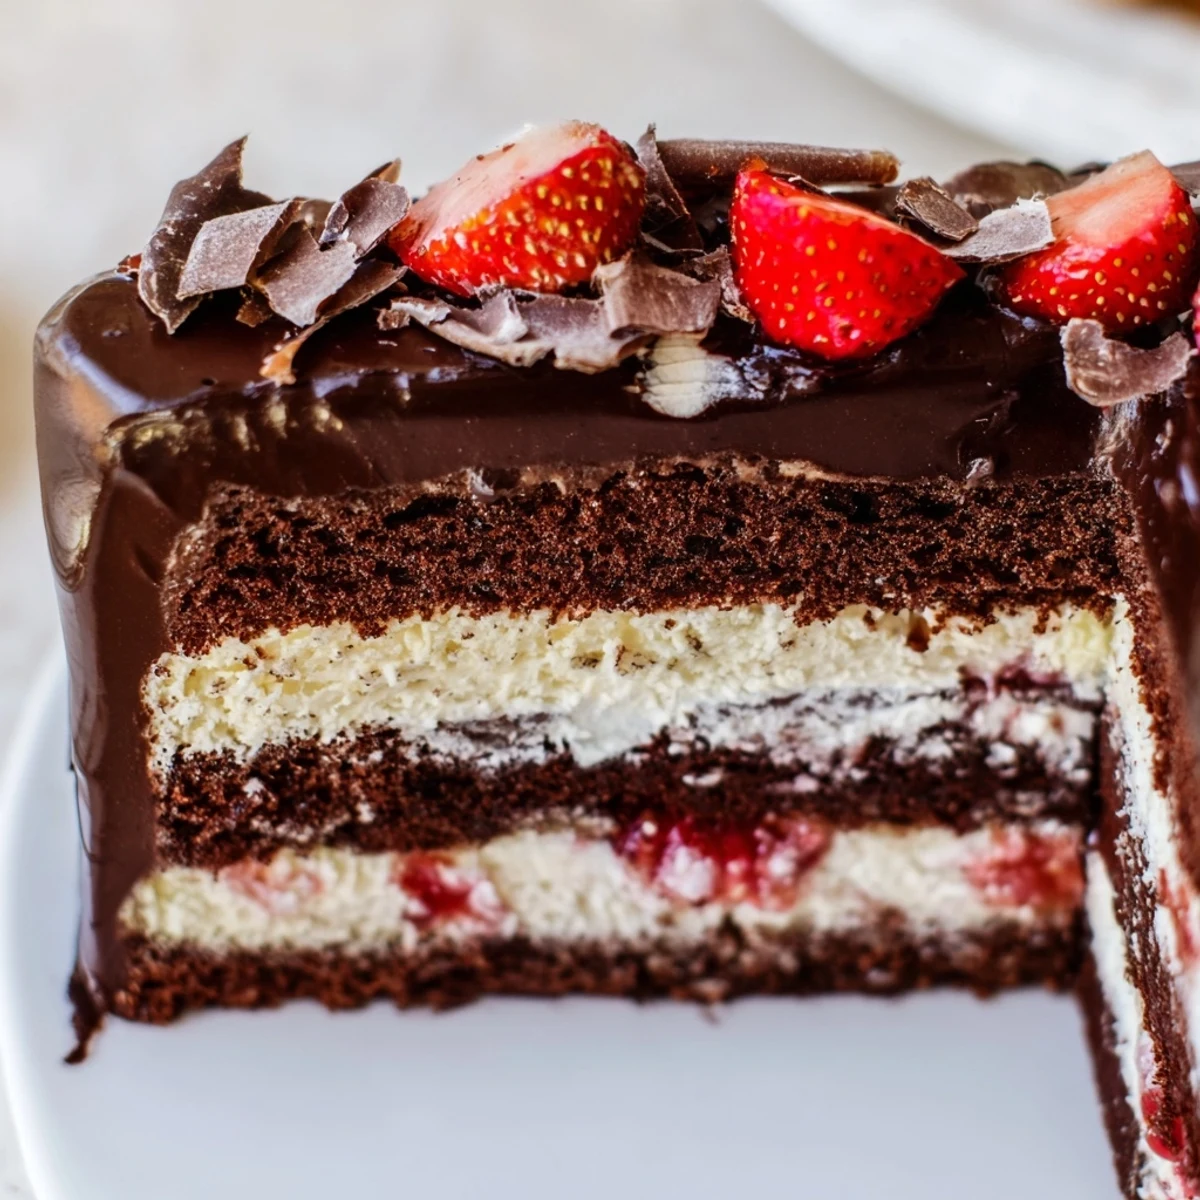
 This stunning creation features three essential components that come together beautifully: a light and fluffy vanilla sponge base, a sweet-tart strawberry compote that cuts through the richness, and billowy whipped cream for lightness. The crowning glory is a glossy dark chocolate shell that creates that signature crackle when sliced.
Perfect for birthdays, dinner parties, or any occasion that calls for something spectacular. The contrast between the cool cream, tender cake, and snappy chocolate coating makes every bite memorable.
The first time I attempted a chocolate shell cake, I stood in my kitchen watching glossy dark chocolate cascade down the sides, completely mesmerized by how something so simple could transform an ordinary dessert into a showstopper. My sister had requested something impressive for her milestone birthday, and honestly, I was nervous about the chocolate cracking or sliding off. But when that first slice revealed the tender vanilla sponge, bright strawberry jam, and perfect snap of the shell, I knew this recipe would live in my permanent rotation forever.
I made this for a dinner party last spring, and the moment I brought it to the table, the conversation completely stopped. The chocolate was still faintly warm from the pour, creating this incredible temperature difference against the chilled strawberry cream inside. My friend Sarah actually took a photo before anyone could touch it, and now every time I see her, she asks when Im making it again.
Ingredients
- 2 cups all-purpose flour: The foundation of your sponge, providing structure without weighing down the delicate crumb
- 1 ½ tsp baking powder: Essential for that perfect rise, giving the cake its tender, airy texture
- ½ tsp salt: Balances the sweetness and enhances all the vanilla and chocolate flavors
- 4 large eggs, room temperature: Room temperature eggs whip up beautifully, creating that light, fluffy sponge we want
- 1 cup granulated sugar: Sweetens the cake while helping create structure and a golden crust
- ½ cup whole milk, room temperature: Adds moisture and tenderness to the crumb
- ½ cup unsalted butter, melted and cooled: Brings richness and flavor, and melted butter incorporates more easily than softened
- 2 tsp pure vanilla extract: Dont skimp here, real vanilla makes all the difference in a simple sponge
- 2 cups fresh strawberries: Fresh strawberries give the brightest flavor and most beautiful jewel-tone filling
- 2 tbsp granulated sugar: Just enough to draw out the strawberries natural juices and sweeten slightly
- 1 tbsp lemon juice: Brightens the strawberry filling and helps the cornstarch activate properly
- 2 tsp cornstarch: Thickens the strawberry mixture into a spreadable jam that wont make your cake soggy
- 1 ¼ cups heavy cream, cold: Cold cream whips up faster and holds its structure better for stable frosting
- 3 tbsp powdered sugar: Sweetens the whipped cream without making it too heavy or grainy
- 1 tsp vanilla extract: Vanilla makes everything better, even cream
- 2 cups dark chocolate (60–70% cocoa): Higher cocoa percentage creates a shell that sets firmly and snaps beautifully
- 2 tbsp coconut oil: The secret ingredient that makes the chocolate shell glossy and gives it that perfect crackle
Instructions
- Prepare your cake pans:
- Grease two 8-inch round pans thoroughly and line the bottoms with parchment paper, this cake needs to release perfectly
- Whisk the dry ingredients:
- Combine flour, baking powder, and salt in a bowl, whisking well to ensure even distribution
- Whip the eggs and sugar:
- Beat eggs and sugar on high speed until pale, fluffy, and tripled in volume, about 5 minutes, this creates the cakes structure
- Gently fold everything together:
- Fold in the flour mixture carefully, then add milk, melted butter, and vanilla, mixing just until combined
- Bake to golden perfection:
- Divide batter between pans and bake for 25-30 minutes until a toothpick comes out clean, then cool completely before frosting
- Make the strawberry filling:
- Combine strawberries, sugar, lemon juice, and cornstarch in a saucepan, cook over medium heat until thickened and jammy, about 7 minutes
- Whip the cream:
- Beat cold heavy cream with powdered sugar and vanilla until stiff peaks form, then chill until ready to use
- Assemble the layers:
- Place one cake layer on your serving plate, spread with strawberry filling, then whipped cream, top with second layer and cover entire cake with remaining cream
- Freeze until firm:
- Chill the assembled cake in the freezer for at least 1 hour, the cake needs to be very cold for the chocolate shell to set properly
- Create the magic shell:
- Melt chocolate and coconut oil together over simmering water or in the microwave, stirring until smooth, then cool to room temperature but still pourable
- Pour the chocolate:
- Remove cake from freezer and pour the chocolate mixture over the top, letting it cascade down the sides and cover completely
- Add final touches:
- Decorate with fresh strawberry halves and edible gold leaf if desired, then chill 30 minutes before slicing
 Save to Pinterest
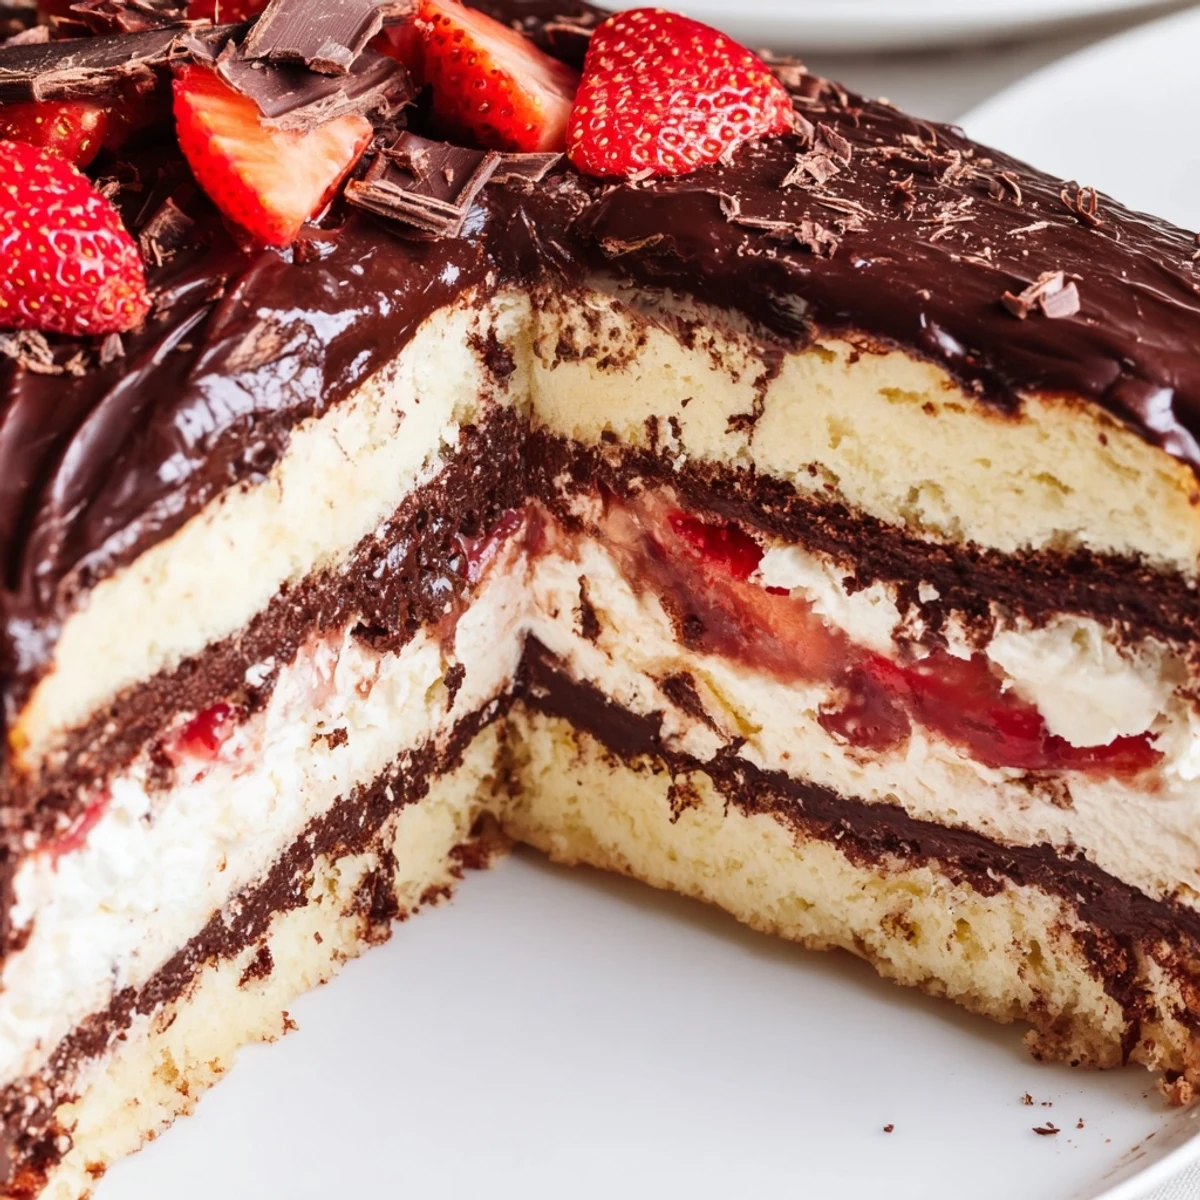
 This cake has become my go-to for celebrations because it always elicits that same gasp when I bring it to the table. Theres something deeply satisfying about cutting through that chocolate shell and revealing the strawberry cream inside, like discovering a hidden treasure.
Making It Ahead
Ive learned through experience that you can bake the sponge layers up to two days ahead and wrap them tightly in plastic. The strawberry filling also keeps beautifully in the refrigerator for three days, and you can even whip the cream the day before and store it in an airtight container. Just give it a quick re-whip before assembling.
Getting The Perfect Shell
The chocolate shell technique is all about temperature and timing. I place my cake on a wire rack over a baking sheet before pouring to catch any drips, and I work quickly but deliberately, starting at the center and guiding the chocolate outward. If you notice any bare spots, use an offset spatula to guide the chocolate where you want it before it sets.
Serving And Storing
This cake is best served slightly chilled, which makes the chocolate shell extra satisfying and keeps the layers stable. I take it out about 15 minutes before serving to take the extreme edge off the cold. Leftovers (if you have any) should be stored in the refrigerator, well covered, and will keep for 2-3 days.
- Use a sharp knife dipped in hot water for clean slices through the chocolate shell
- If the shell cracks while cutting, press any loose pieces back onto the slices for serving
- The cake freezes beautifully for up to a month if wrapped tightly before adding the chocolate shell
 Save to Pinterest
 Every time I make this cake, Im reminded that the most impressive desserts often come from the simplest techniques executed with care. Watching someone break through that chocolate shell and take that first bite never gets old.
Recipe Questions & Answers
- → How far ahead can I make this?
-
The cake layers can be baked and frozen up to 2 weeks ahead. Assemble and chill the day before serving. The chocolate shell is best added within 4 hours of serving to maintain its signature gloss and crackle.
- → Why must the cake be frozen before adding chocolate?
-
Freezing firms up the whipped cream filling completely, which prevents it from melting when the warm chocolate shell is poured over. A cold cake also helps the chocolate set quickly into that gorgeous glossy finish.
- → Can I use milk chocolate instead?
-
You can, but milk chocolate contains more sugar and dairy fat, resulting in a softer shell that may not crackle as dramatically. Dark chocolate between 60-70% cocoa creates the most impressive snap and shine.
- → How do I get clean slices?
-
Use a sharp knife dipped in hot water and wiped dry between cuts. Let the chilled cake sit at room temperature for 10 minutes before slicing to allow the chocolate shell to soften slightly for cleaner cuts.
- → What other fruits work well?
-
Raspberries create a lovely tart contrast, while mixed berries offer variety. For something different, try caramelized bananas or poached pears. The key is using cooked fruit fillings that won't make the layers soggy.
- → My chocolate shell turned out matte, not glossy. What happened?
-
This usually means the chocolate was too hot when poured or moisture got into the mixture. Ensure your chocolate has cooled to room temperature but is still fluid, and that no water touches the chocolate during melting.
