 Save to Pinterest
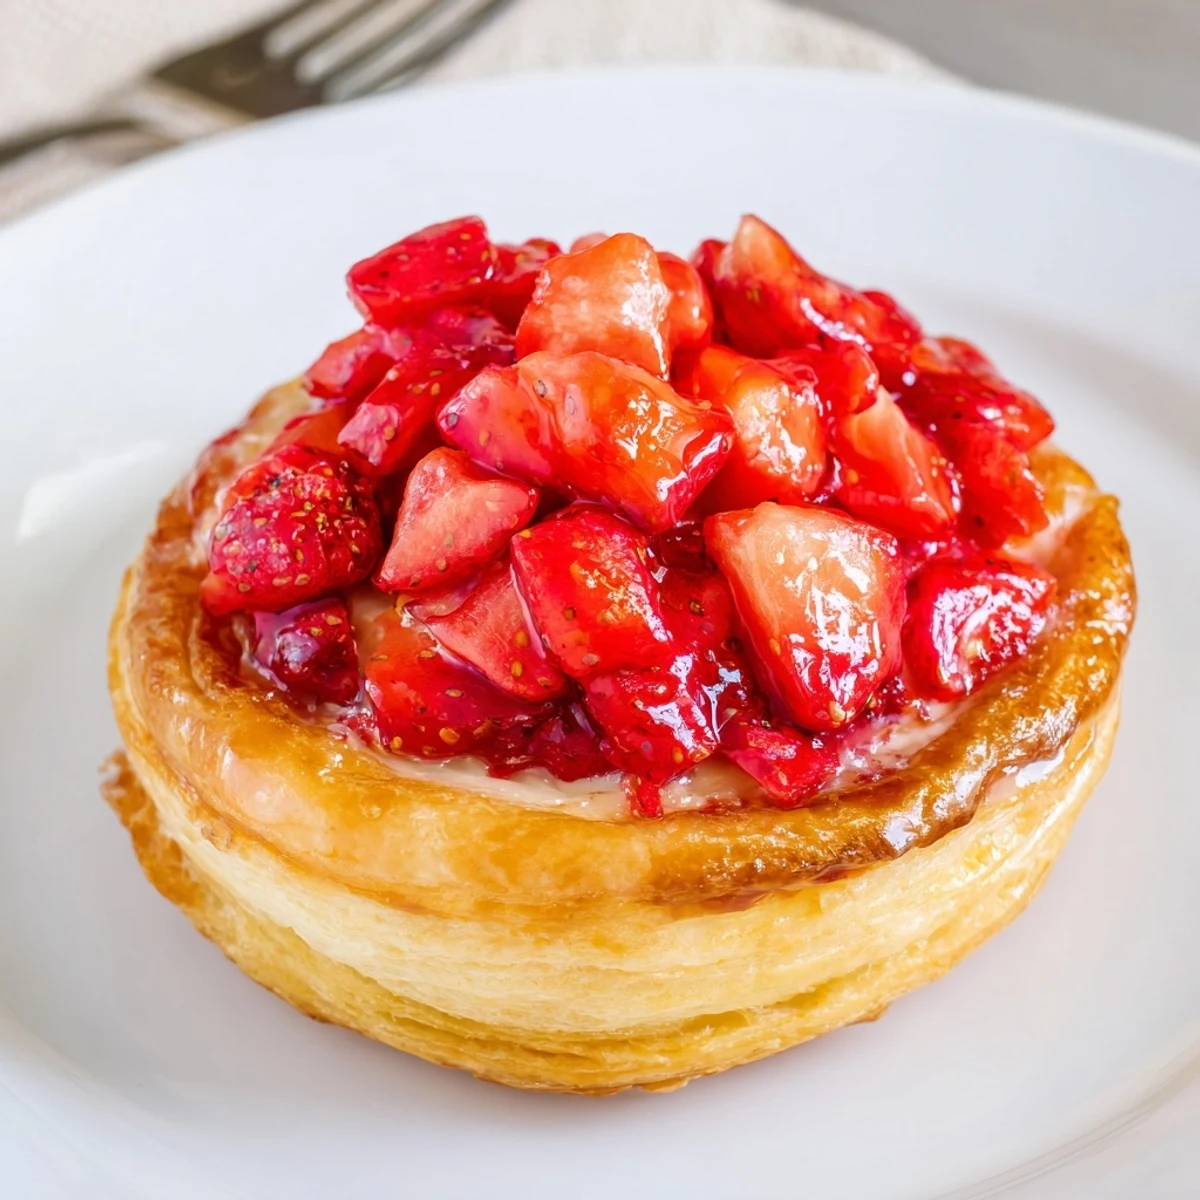
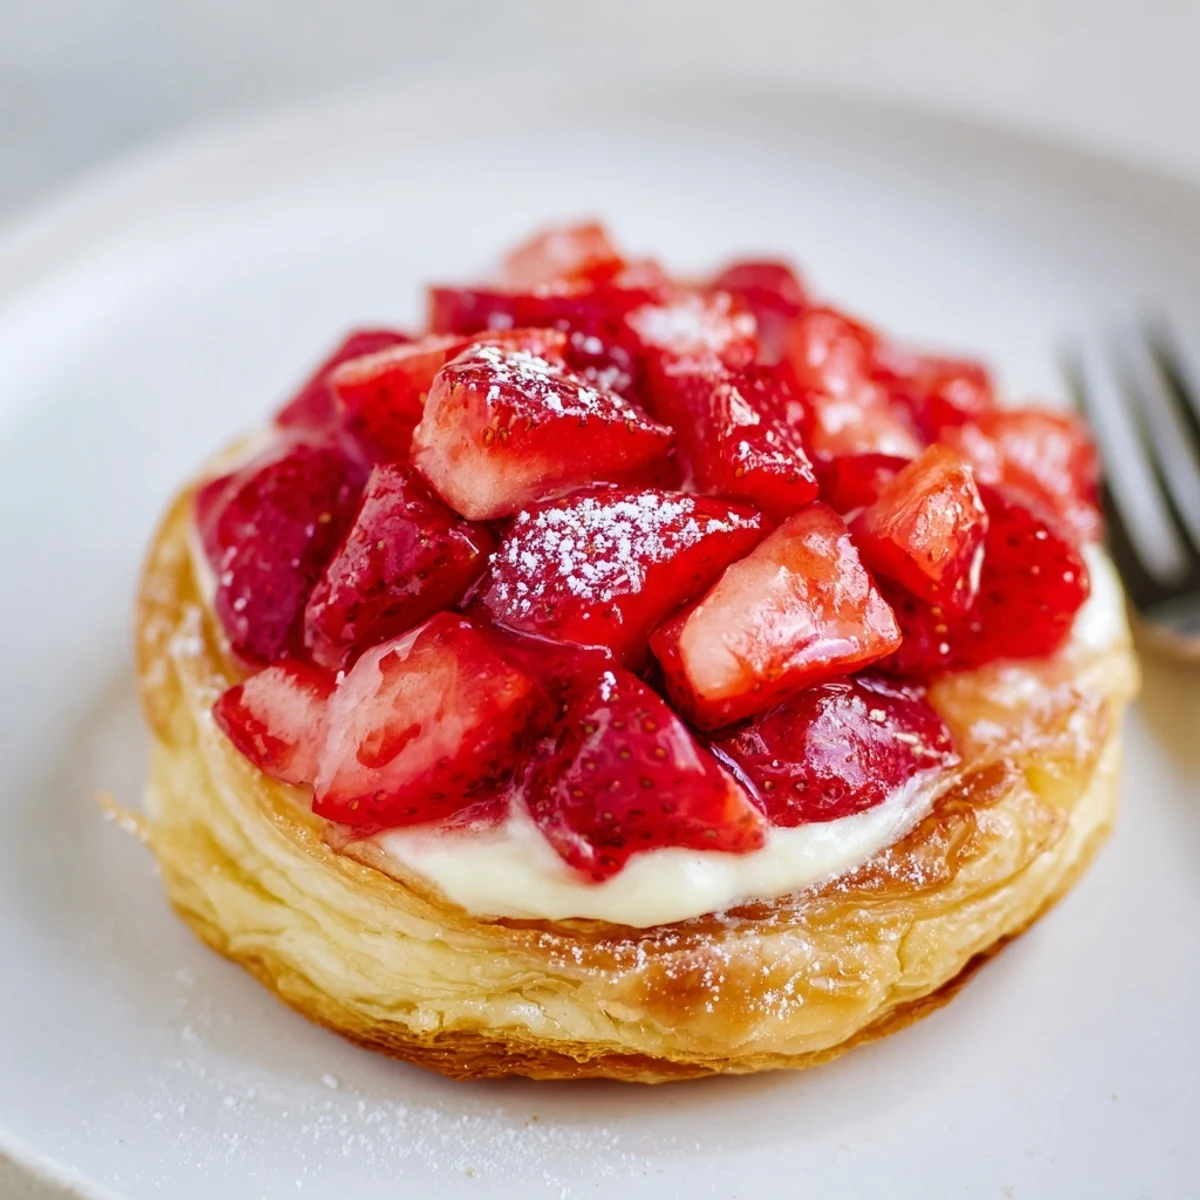
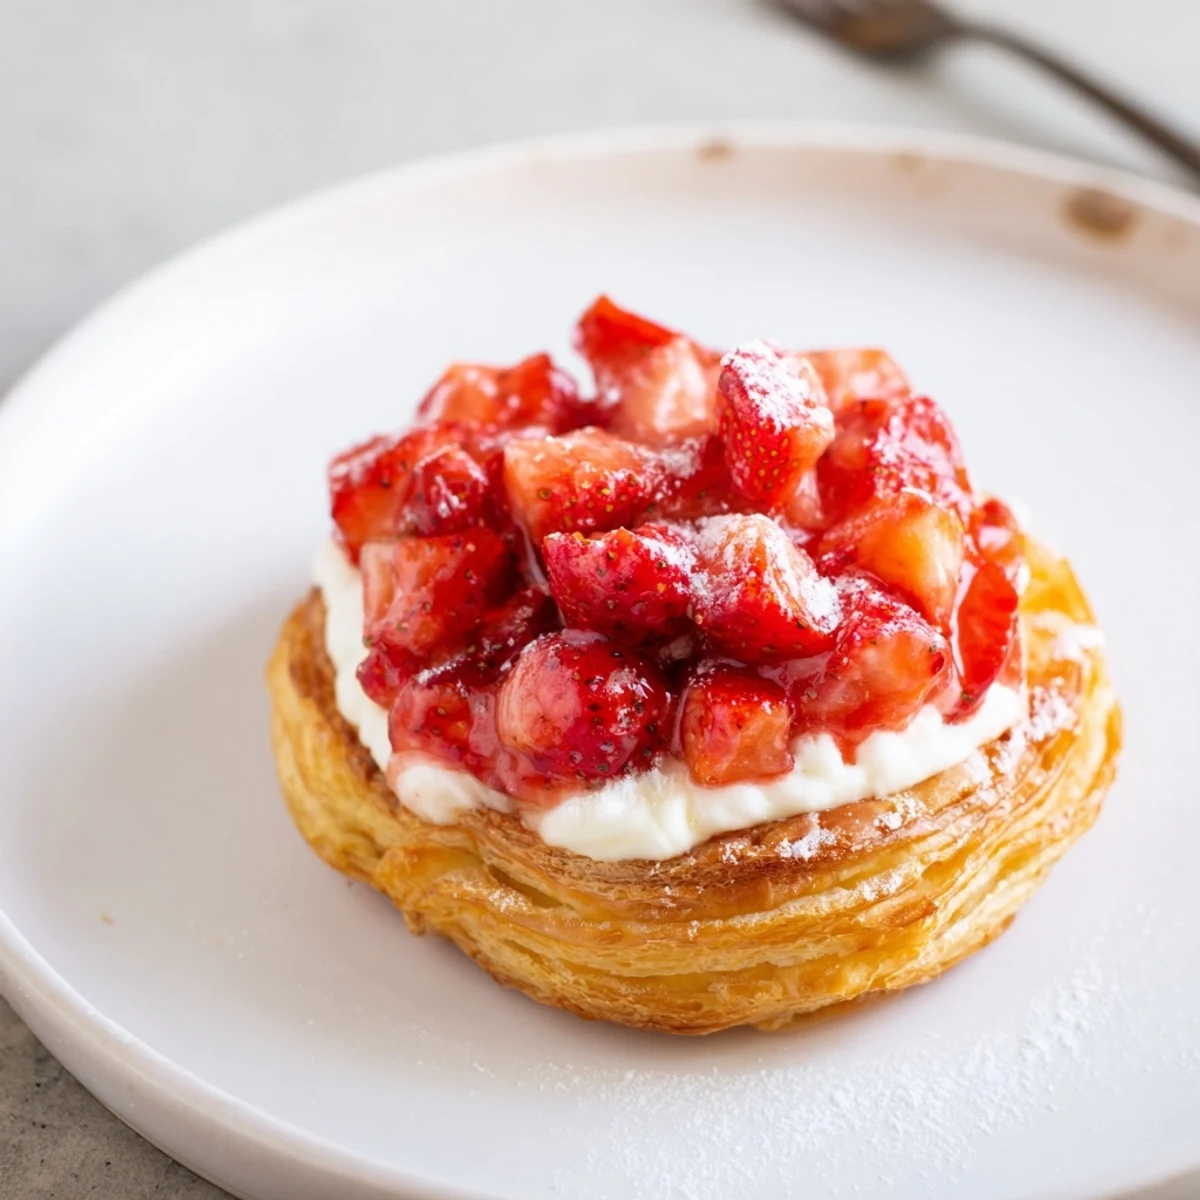
 Build flaky, golden pastries by cutting thawed puff pastry into squares, scoring a shallow border, and spooning a cream cheese mixture topped with macerated strawberries. Brush edges with egg wash and bake at 200°C (400°F) for 18–22 minutes until puffed and golden. Cool slightly, then drizzle a simple powdered sugar glaze if desired. Yields 8 pastries; total time about 45 minutes.
The sound of puff pastry crackling in the oven has a way of drawing everyone into the kitchen, but it was the scent of sweet strawberries bubbling that made me sneak a peek before the timer went off. Baking these Strawberry Danishes felt a bit like orchestrating a tiny morning celebration, whether or not anyone else was awake yet. The trickiest part at first was resisting the urge to overfill them—those juicy berries are pretty convincing. I learned quickly that a little restraint results in the neat, golden pastries I had always admired in bakery windows.
One spring Saturday, I made these Danishes for a brunch where my friend arrived still wearing pajamas, drawn in by the buttery aroma. We ended up eating them standing at the counter, warm and drizzled with glaze, and laughing about the uneven shapes. Even the slightly wonky ones disappeared first. It's a recipe that has a way of making any kitchen feel a little lighter.
Ingredients
- Puff pastry sheet: Thawed puff pastry gives these Danishes their trademark flaky layers; handling it cold keeps the butter from melting and guarantees that lovely rise.
- Cream cheese: I always let it soften on the counter—beating it cold just leads to lumps, and a creamy filling feels special.
- Granulated sugar: Used in both fillings (and perfectly measured so things aren’t too sweet), a little sugar helps the strawberries juice and the cheese to shine.
- Vanilla extract: After experimenting, I found that real vanilla brings an aromatic warmth to both the filling and optional glaze.
- Lemon zest and juice: A dash of both perks up the cheese with flavor and balances the strawberry sweetness; don’t skip it.
- Strawberries: Dice them small so they nestle into the pastry, and if using frozen, pat them dry so your Danishes stay crisp.
- Cornstarch: This thickens the strawberry juice so it doesn’t run wild in the oven—just a little bit does the trick.
- Egg: Brushing with egg wash gives the pastry a deep golden color that always impresses.
- Milk: Whisked with the egg for wash, and used again to loosen the glaze for that proper drizzle.
- Powdered sugar: Makes a simple, glossy glaze that I love for both looks and a touch of extra sweetness.
Instructions
- Get everything ready:
- Preheat your oven to 200°C (400°F) and line a baking tray with parchment paper so nothing sticks.
- Whip up the cheesy foundation:
- In a bowl, mix softened cream cheese, sugar, vanilla, and lemon zest until it’s cloudlike—smooth is the way to go.
- Prep the strawberries:
- Toss diced berries with sugar, lemon juice, and cornstarch until they glisten and look just a bit syrupy.
- Shape your pastry:
- Roll out the puff pastry, slice into eight little squares, and lightly score a border around the edge to help the sides rise.
- Layer the fillings:
- Spoon about a tablespoon of the cream cheese mix at the center of each square and smooth it out, careful to stay inside the scored lines.
- Add the berries:
- Top with a heaping tablespoon of strawberry filling, catching any syrup that’s formed for extra flavor but not so much that it spills over.
- Give it a golden touch:
- Brush exposed pastry edges with egg wash so you end up with a beautifully burnished finish after baking.
- Let them puff and color:
- Bake for 18–22 minutes until golden, puffy, and your kitchen smells like summer—rotate the tray once for even browning.
- Cool and glaze:
- Set the Danishes on a wire rack for a few minutes so the bottoms stay crisp, then drizzle the glaze on when they’re just warm.
 Save to Pinterest
 There was a time I baked these for a neighbor who’d just moved in, planning to leave a few at her door—but we both ended up sitting on the steps, still in our slippers, sharing the whole batch. Sometimes, a warm Danish creates a new friendship faster than any introduction. That moment still makes me smile every time I smell strawberries baking in butter.
Fresh Takes on the Classic
Once I got comfortable with the basic recipe, I started mixing in raspberries or blueberries depending on the market haul. Swapping in different fruits kept things exciting, and sometimes I’d add a dash of almond extract or a sprinkle of chopped nuts for a more decadent twist. A little experimentation keeps this recipe feeling fresh without losing its comforting roots.
Getting That Perfect Flake
Working with puff pastry taught me patience—cold dough is non-negotiable for flaky layers. I pop the cut squares in the fridge for ten minutes before filling if my kitchen is warm. There’s real satisfaction in pulling out pastries that have puffed tall and golden, like a hidden bakery right in my oven.
What I’d Tell My Past Self
It’s always easier to assemble pastries on the tray you’ll bake them on; moving them after filling risks tearing those delicate borders. Glazing too early will cause it to vanish, so aim for just-warm pastries. Set aside a few minutes to actually sit and savor one fresh—they’re best when shared (or stolen while still cooling).
- Plan your assembly for minimal movement and fuss.
- Get the kids involved with spreading and drizzling—the mess is part of the fun.
- Don’t be shy with the vanilla in the glaze; it’s a simple detail that really sets these Danishes apart.
 Save to Pinterest
 Whether you’re sharing these over coffee or sneaking one late at night, Strawberry Danish brings bakery magic home. Here’s to sticky fingers, bright mornings, and more reasons to linger in the kitchen together.
Recipe Questions & Answers
- → Can I use frozen strawberries?
-
Yes. Thaw and drain frozen berries thoroughly, then toss with sugar and a little cornstarch to absorb excess juice before assembling to prevent a soggy base.
- → How do I keep the pastry from getting soggy?
-
Score a shallow border to contain fillings, use a thin layer of cream cheese as a moisture barrier, and ensure fruit is lightly macerated and thickened with cornstarch. Prebake on a hot tray can also help.
- → Can I make these ahead or freeze them?
-
Assemble unbaked pastries and freeze on a tray until firm, then transfer to a bag. Bake from frozen, adding a few extra minutes. Baked pastries freeze well; reheat in a low oven to restore crispness.
- → What can I use instead of cream cheese?
-
Mascarpone, ricotta whipped smooth with a touch of sugar and vanilla, or a thick pastry cream all work as creamy alternatives with slightly different textures and flavors.
- → How do I get an evenly golden finish?
-
Brush the pastry border with an egg wash mixed with a tablespoon of milk just before baking and rotate the tray halfway through for even browning.
- → How can I vary the filling for seasonal fruit?
-
Swap strawberries for raspberries, blueberries, or stone fruits. Adjust sugar to taste and use a small amount of cornstarch for juicier fruit to help thicken the filling.
