 Save to Pinterest
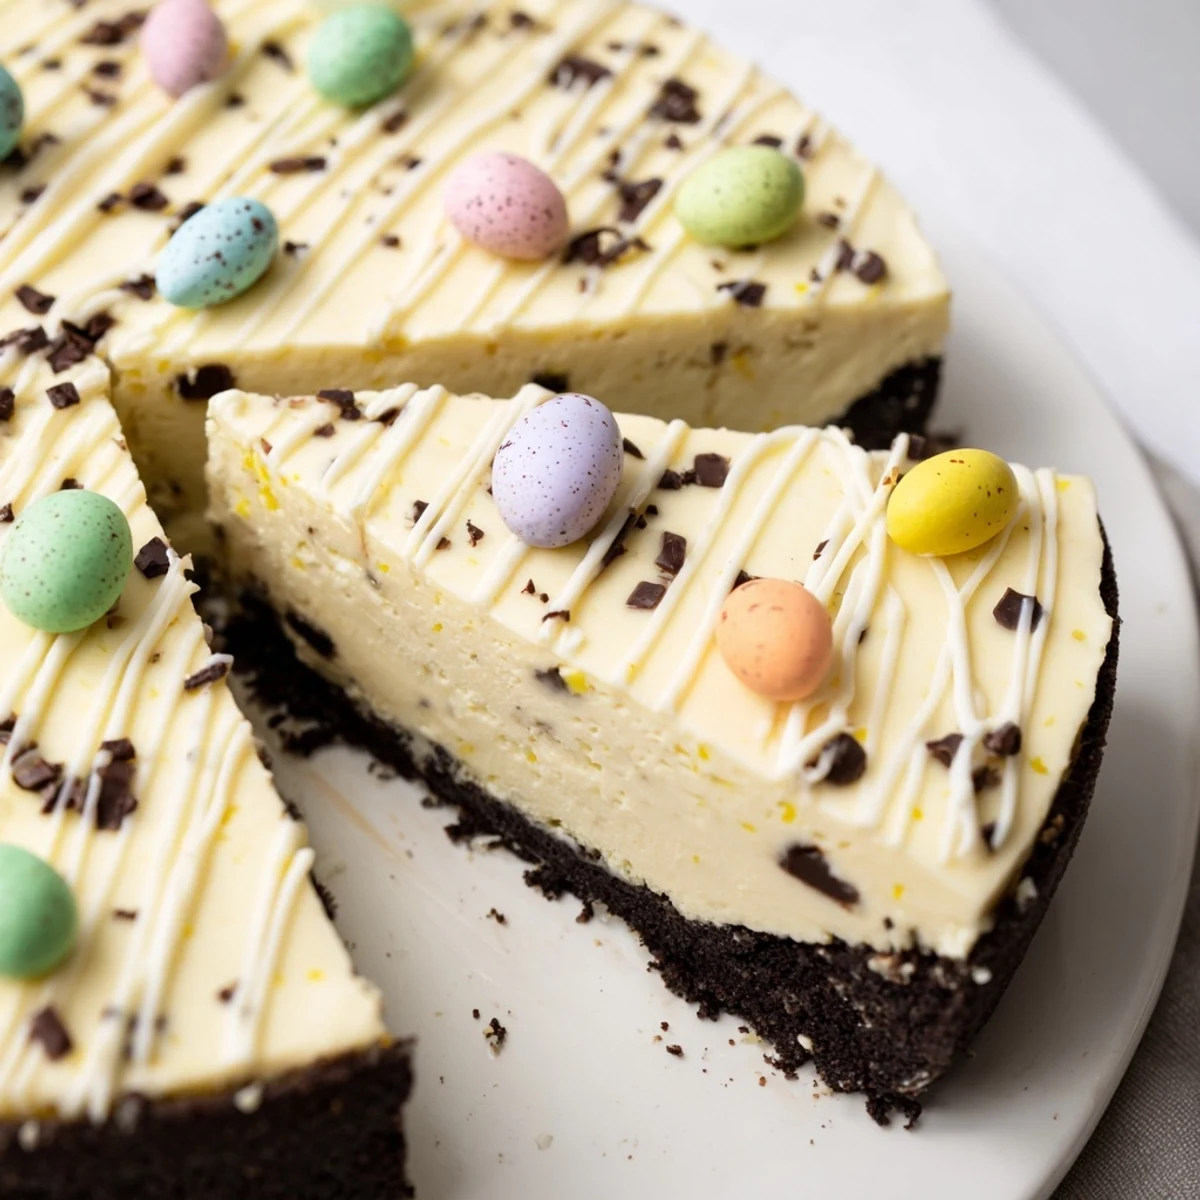
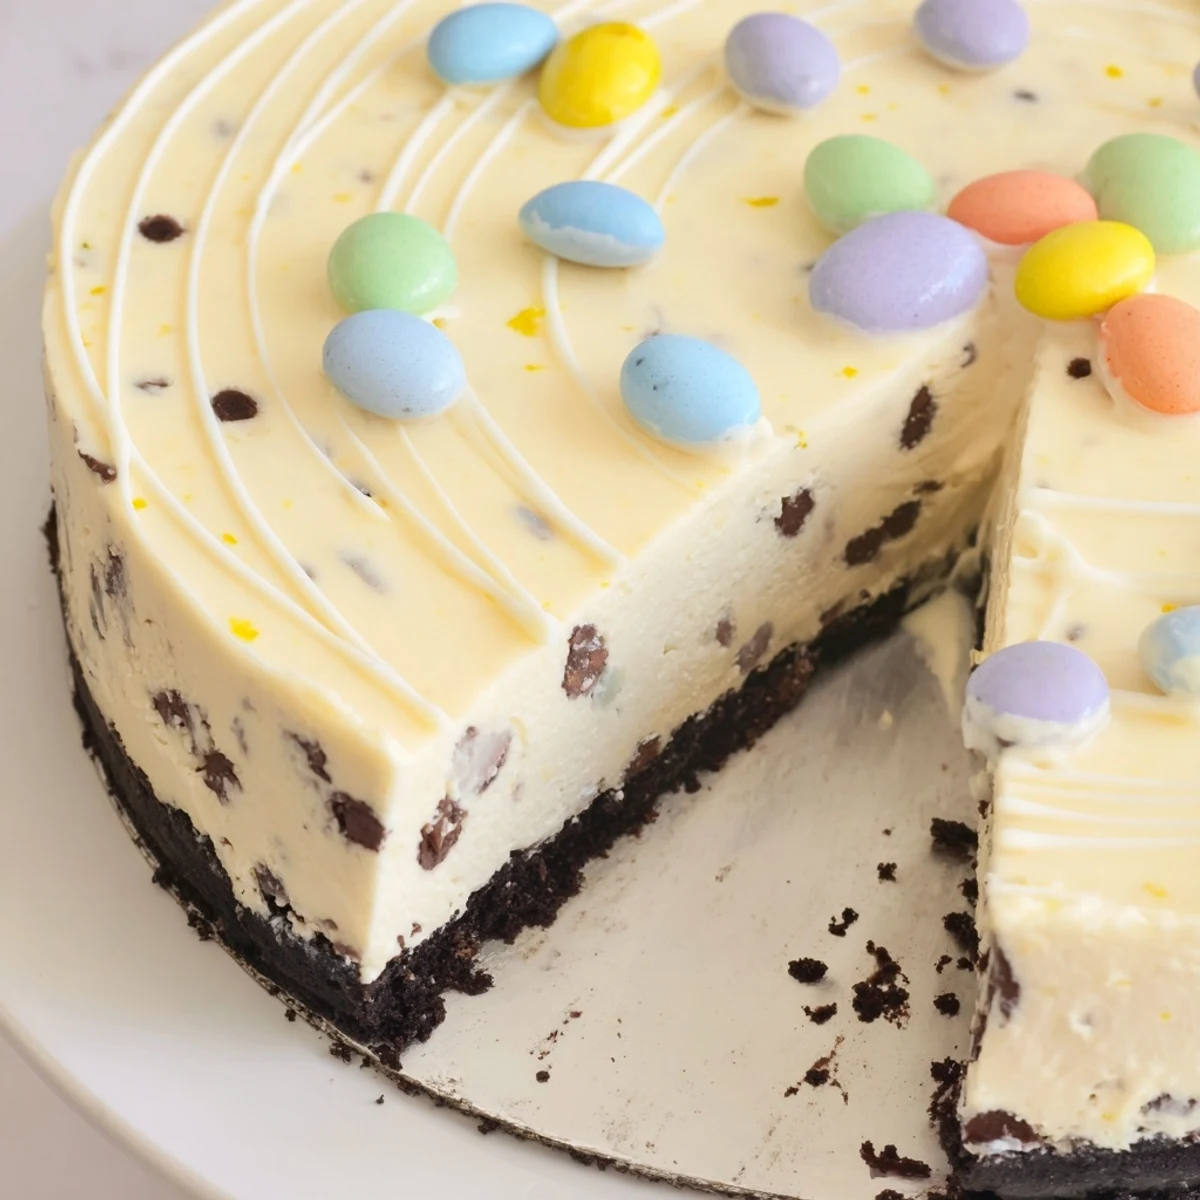
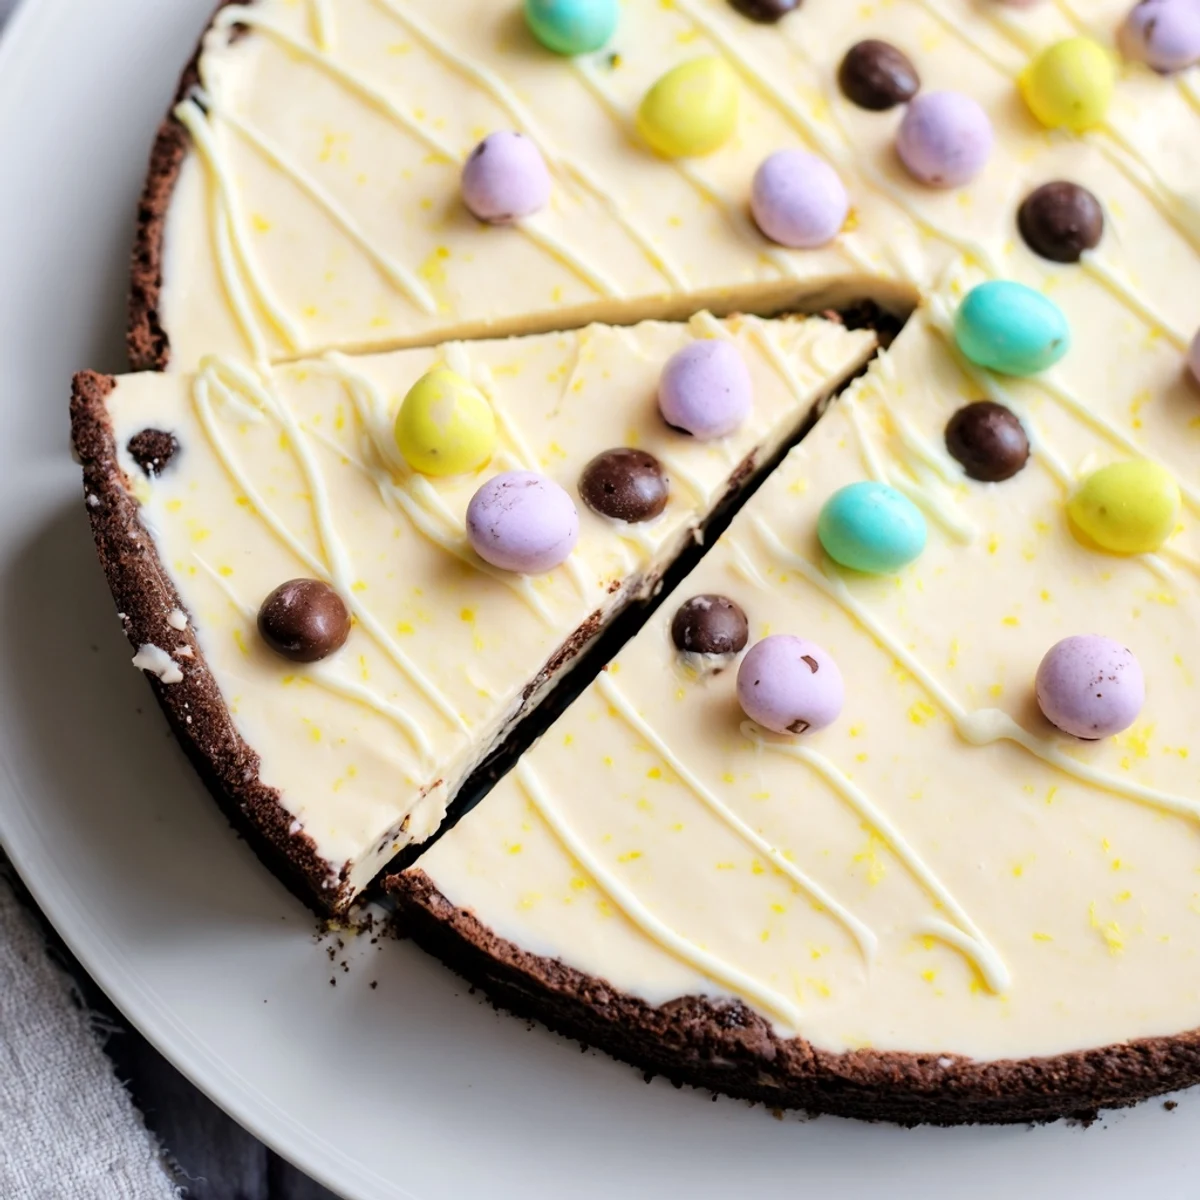
 This indulgent Easter dessert features a smooth, creamy vanilla filling nestled atop a crunchy chocolate sandwich cookie crust. The cheesecake bakes until perfectly set with a slight wobble in the center, then slowly cools to prevent cracking. After thorough chilling, the crown gets adorned with an array of pastel and speckled mini chocolate eggs, with optional white chocolate drizzle adding an elegant finish.
The kitchen counter was covered in pastel wrappers, my daughter carefully sorting the chocolate eggs by color while I creamed cheese and sugar together. She insisted we needed 'more pink ones' on top, creating such a serious debate about Easter egg aesthetics that I nearly forgot to set the oven timer. That first bite of the finished cheesecake—crunchy chocolate crust giving way to the creamiest filling I'd ever made—silenced all the color arguments immediately.
Last Easter, my sister-in-law quietly confessed she'd been planning her approach to this cheesecake since Christmas dinner ended. Watching her face light up when she discovered the surprise crunch of buttery cookies beneath all that velvety smoothness made every minute of chilling time worth it. Now it's become the official request for every family gathering, spring or not.
Ingredients
- Chocolate sandwich cookies: Crushing these by hand creates irregular chunks that bake into a wonderfully textured crust
- Unsalted butter: Melt it completely and let it cool slightly so it binds the cookie crumbs without making them soggy
- Full-fat cream cheese: Bring this to room temperature absolutely no exceptions—cold cream cheese creates lumps that ruin the silky texture
- Granulated sugar: This amount hits the perfect sweet spot without overwhelming the tangy cream cheese flavor
- Cornstarch: The secret ingredient that prevents cracks and gives the cheesecake its velvety structure
- Sour cream: Adds a subtle tang that cuts through the richness and makes the filling impossibly smooth
- Large eggs: Room temperature eggs incorporate more easily and prevent overmixing which can lead to a dense texture
- Pure vanilla extract: Don't skimp here—vanilla bridges all the flavors together beautifully
- Lemon zest: Brightens the entire cheesecake without making it taste like lemon dessert
- Mini chocolate Easter eggs: Press these gently into the chilled cheesecake so they sit proudly on top
- White chocolate: Melt this slowly and drizzle over the eggs for that professional bakery finish
Instructions
- Prepare your pan and preheat:
- Set your oven to 160°C (320°F) and line the bottom of a 23 cm springform pan with parchment paper.
- Build the chocolate crust:
- Crush the cookies into fine crumbs and stir in melted butter until everything is coated and press this mixture firmly into your pan base then chill it.
- Create the smooth filling:
- Beat room temperature cream cheese and sugar until completely smooth then add cornstarch and mix until you can't see any white powder.
- Add the flavor makers:
- Blend in sour cream followed by eggs one at a time then add vanilla extract and lemon zest mixing just until combined.
- Assemble and bake:
- Pour the filling over your chilled crust smooth the top and bake for 50 to 60 minutes until edges are set but the center still wobbles slightly.
- The cool down:
- Turn off the oven crack the door and let the cheesecake cool inside for one hour then remove and let it cool completely before chilling for at least four hours.
- The festive finish:
- Decorate the chilled cheesecake with mini chocolate eggs and drizzle with melted white chocolate before serving.
 Save to Pinterest
 My niece who claims she doesn't like cheesecake took one look at all those colorful eggs on top and asked for 'just a tiny slice' then went back for thirds. Now every time she visits she asks if we're having 'that egg cake' and helps arrange the decorations with such concentration you'd think she was working on a masterpiece.
Making It Ahead
This cheesecake actually improves with a day in the refrigerator letting all the flavors meld together and the texture become even creamier. I've made it up to two days before serving covering it carefully once it's completely chilled and adding the decorations just before guests arrive.
Getting That Perfect Slice
Run a thin knife under hot water then dry it before slicing—each cut should be clean and show off all the beautiful layers. Dip the knife in hot water and wipe it clean between slices for the most professional presentation.
Customizing Your Creation
Swap lemon zest for orange if you prefer a different citrus note or try crushing some chocolate eggs into the crust itself for extra crunch throughout. The recipe adapts beautifully to whatever chocolate eggs you can find from classic pastels to sophisticated speckled varieties.
- Use full-fat cream cheese and sour cream for the best texture
- Room temperature ingredients are your best friend in this recipe
- Patience during cooling prevents all those cracks we want to avoid
 Save to Pinterest
 There's something magical about cutting into that first slice revealing the perfect layers and watching eyes light up around the table. Happy baking and may your Easter be as sweet as this cheesecake.
Recipe Questions & Answers
- → How long should the cheesecake chill before serving?
-
Refrigerate for at least 4 hours, though overnight chilling produces the best texture and flavor. This allows the filling to fully set and develop its rich taste.
- → Can I make this cheesecake ahead of time?
-
Yes, prepare up to 2 days in advance and keep refrigerated. Add the chocolate egg decorations just before serving for the freshest appearance.
- → Why does my cheesecake crack on top?
-
Overbeating the filling or rapid temperature changes cause cracks. Mix only until combined and cool gradually in the oven with the door cracked open.
- → Can I substitute the chocolate sandwich cookies?
-
Try chocolate graham crackers, digestive biscuits mixed with cocoa, or vanilla wafers for a lighter crust variation.
- → How do I know when the cheesecake is done baking?
-
The edges should appear set while the center retains a gentle wobble when gently shaken. The residual heat completes the cooking process.
