 Save to Pinterest
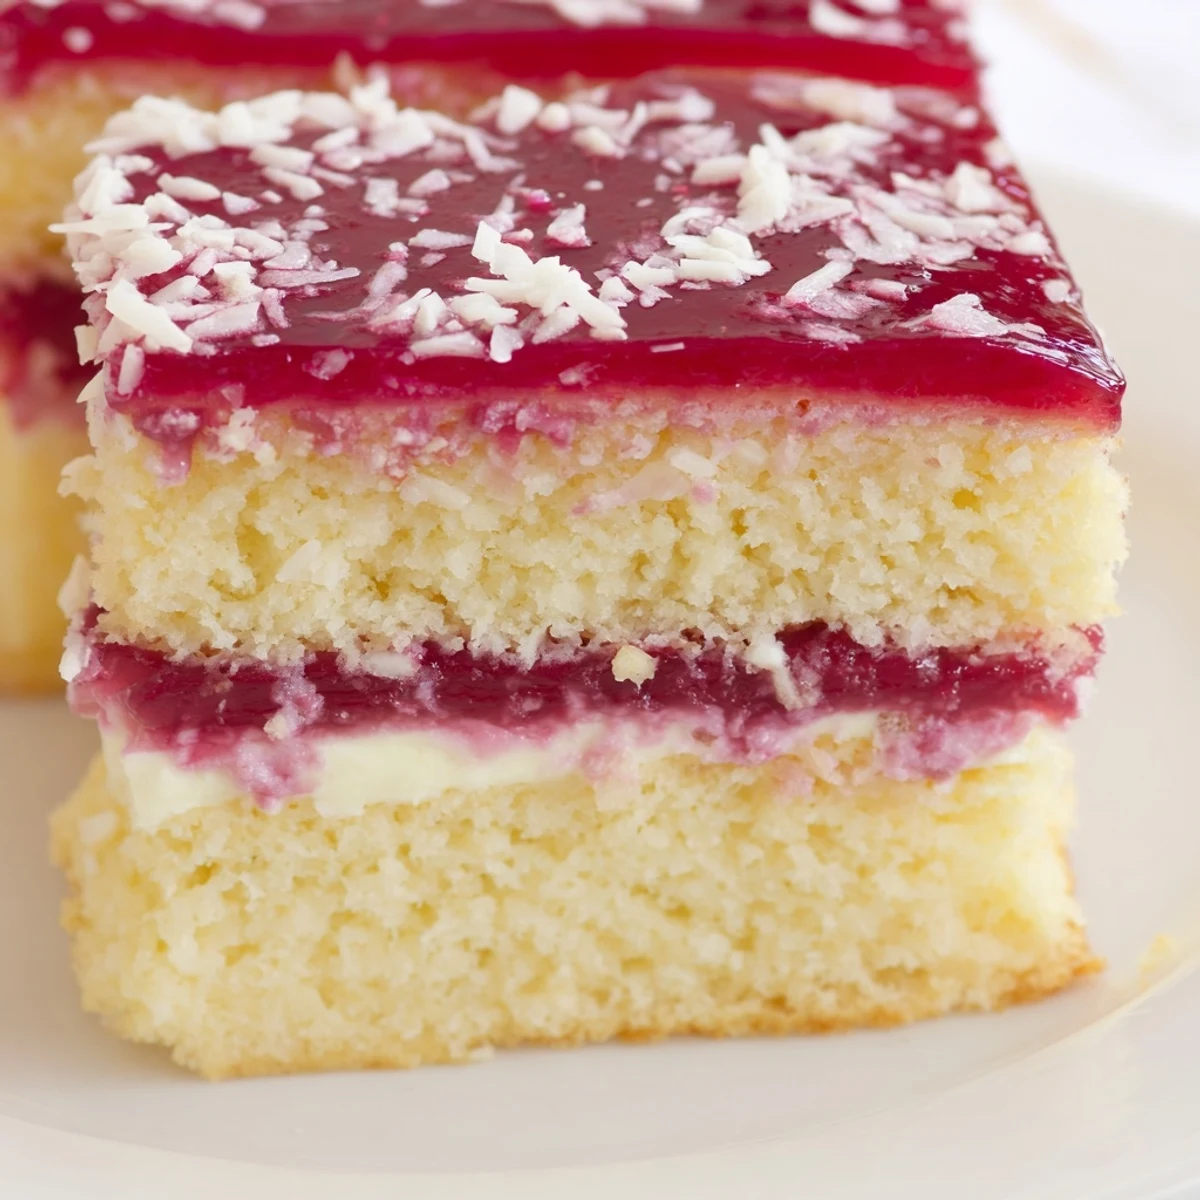
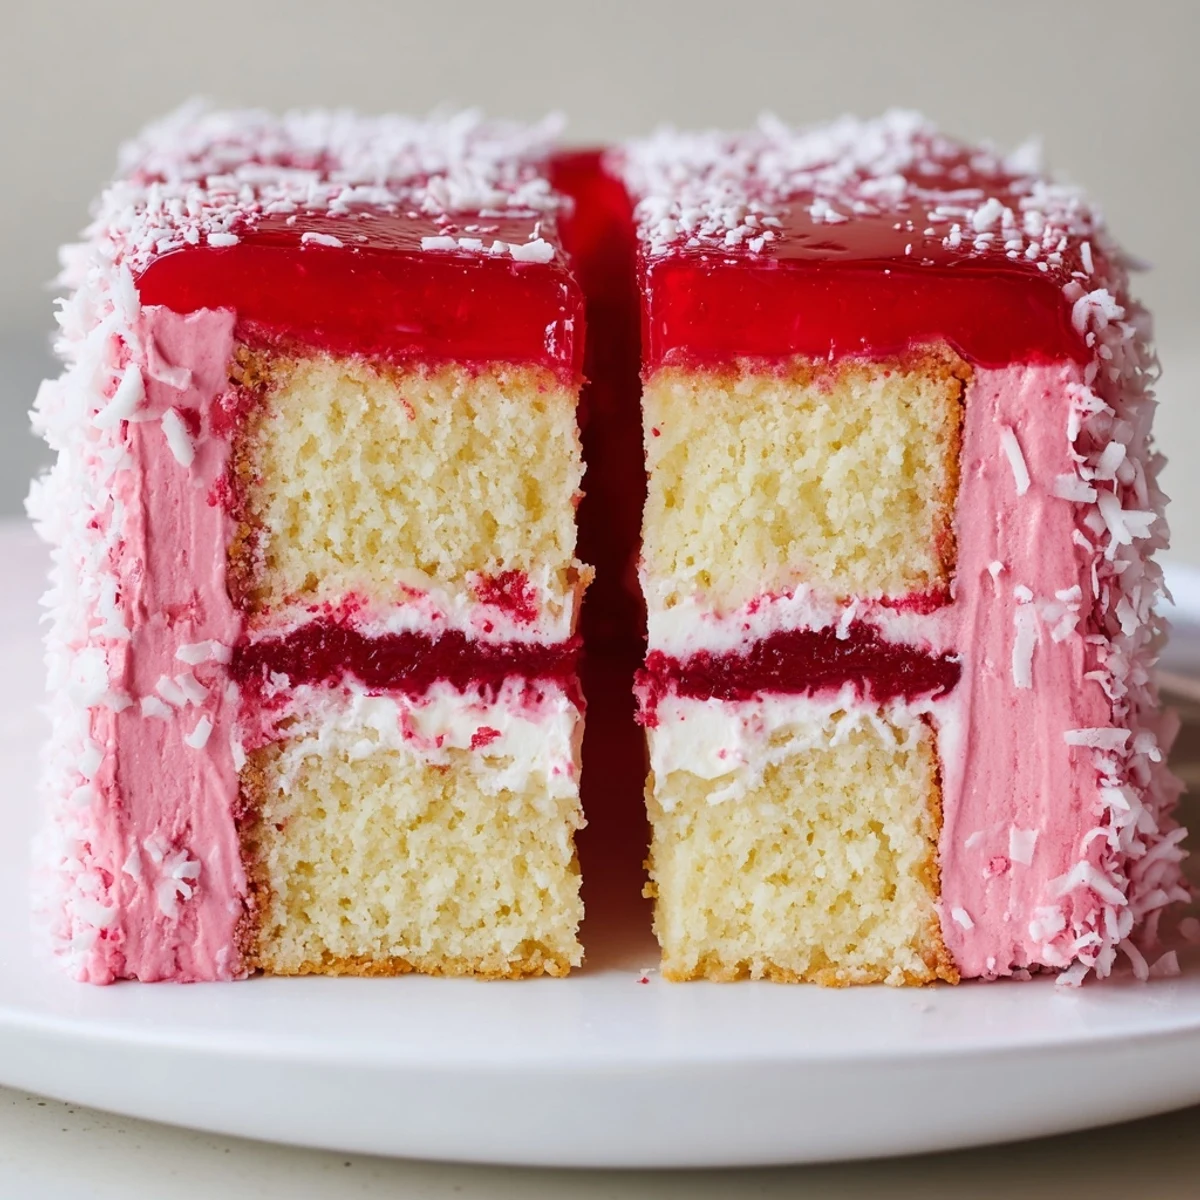
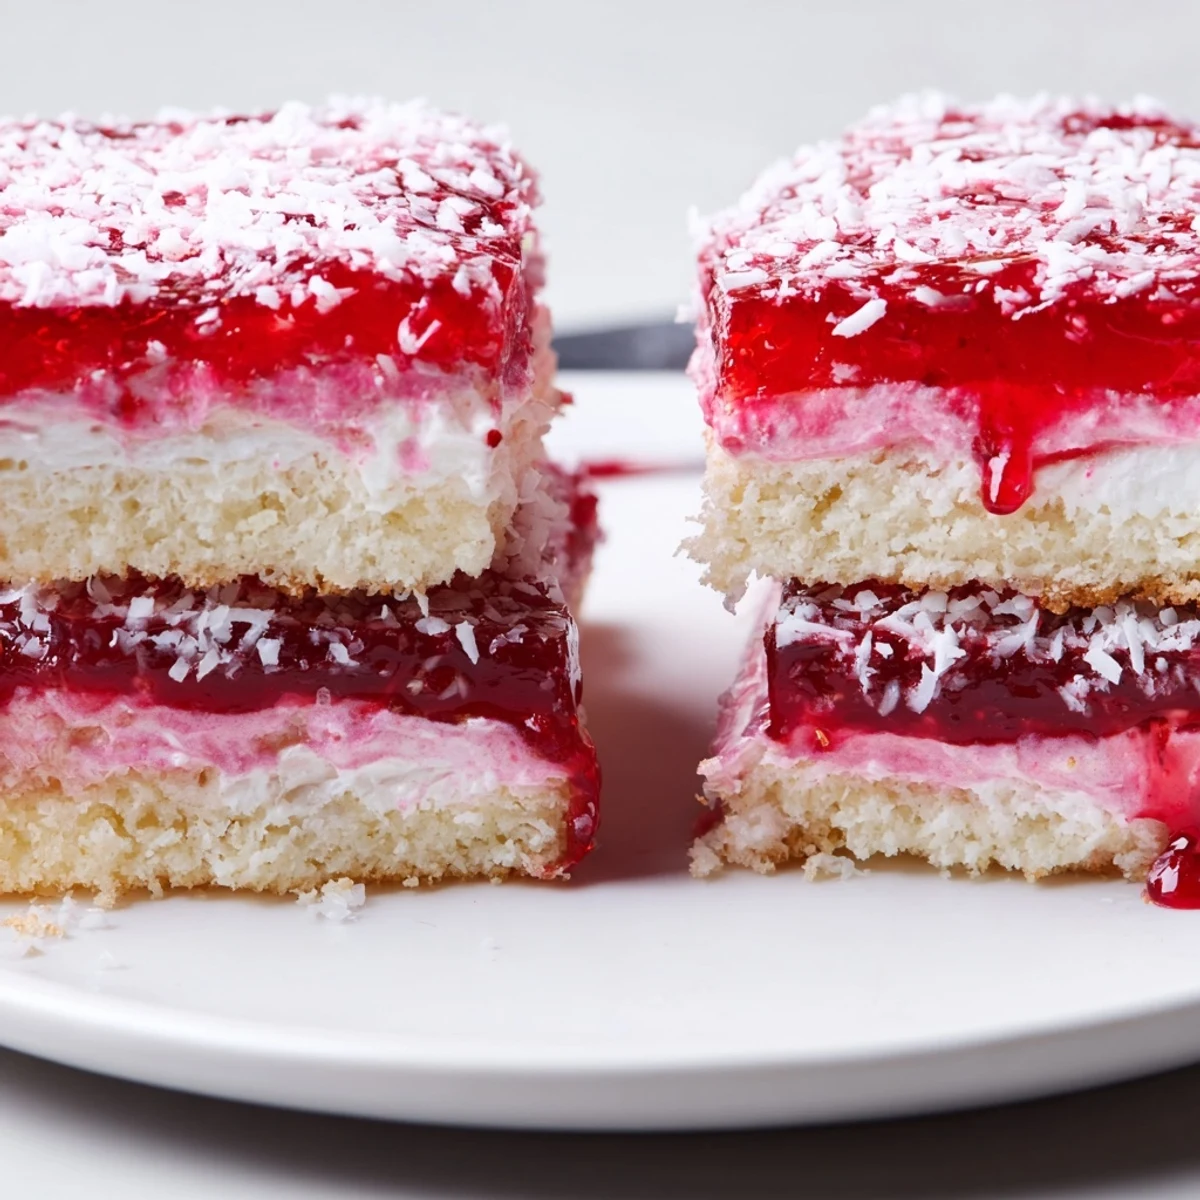
 Make a thin sponge batter, bake 12-15 minutes and cool. Dissolve raspberry jelly in boiling water, chill until just set. Whip cream with icing sugar and vanilla. Sandwich two sponge squares with cream, dip each in the semi-set jelly to coat, then roll in desiccated coconut. Refrigerate until firm. Try passionfruit or orange jelly, or use whipped coconut cream for dairy-free.
My grandmother's kitchen always smelled like butter and coconut on Saturday mornings, and these pink jelly cakes were her signature contribution to every church fundraiser and afternoon tea for thirty years.
I ruined an entire batch once by rushing the jelly setting stage and ending up with cakes that looked like they had been dragged through a pink swamp, which my brother still brings up at every family gathering.
Ingredients
- Unsalted butter (125 g, softened): Pull it out of the fridge an hour before you start because cold butter will never cream properly and your sponge will be dense.
- Caster sugar (125 g): The fine crystals dissolve quickly into the butter, giving you that silky aeration coarse sugar simply cannot achieve.
- Large eggs (2): Room temperature eggs incorporate more air, which is the whole secret to a sponge that rises tall and stays tender.
- Vanilla extract (1 tsp): Use pure extract if you can find it because the fake stuff fights with the delicate raspberry flavor of the jelly.
- Self-raising flour (180 g, sifted): Sifting is not optional here since it lifts the flour with air and removes any lumps that would weigh down your batter.
- Milk (100 ml): Added gradually to keep the batter smooth and slightly loose so it spreads evenly in the tin.
- Raspberry or strawberry jelly crystals (1 packet, 85 g): Raspberry is traditional and gives that classic blushing pink, but strawberry works beautifully too.
- Boiling water (250 ml) and cold water (150 ml): These dissolve the crystals and create the jelly bath that transforms plain sponge into something magical.
- Thickened cream (200 ml): Heavy cream whipped to firm peaks becomes the soft white heart holding each little cake together.
- Icing sugar (1 tbsp): Just enough to sweeten the cream without making it cloying.
- Vanilla extract (1/2 tsp, for cream): A whisper of vanilla in the filling ties the creamy center to the fragrant sponge.
- Desiccated coconut (100 g): The snowy coating that makes these unmistakably Australian and gives a gentle chew against the soft jelly.
Instructions
- Prepare your oven and tin:
- Heat the oven to 180°C (350°F) and grease then line your 20cm by 30cm baking tin with parchment paper, pressing it into the corners so the sponge releases cleanly later.
- Beat butter and sugar until dreamy:
- Using an electric mixer, cream the softened butter and caster sugar for a full four to five minutes until the mixture turns pale gold and falls in soft ribbons from the beater.
- Add eggs and vanilla:
- Beat in the eggs one at a time, mixing until each disappears completely before adding the next, then pour in the vanilla and blend until fragrant.
- Fold in flour and milk gently:
- Spoon the sifted flour into the batter in three additions, alternating with splashes of milk, folding with a large metal spoon until everything is just combined and you see no dry streaks.
- Bake the sponge:
- Spread the batter evenly into your prepared tin and bake for twelve to fifteen minutes until the top springs back lightly under your fingertip and a skewer poked into the center comes out clean.
- Cool the sponge completely:
- Let the sponge rest in the tin for ten minutes, then gently invert it onto a wire rack and leave it until it reaches room temperature because warm sponge will melt your jelly and dissolve your cream.
- Start the jelly:
- While the sponge cools, dissolve the jelly crystals in boiling water, stir in the cold water, pour the mixture into a shallow dish, and refrigerate for forty-five to sixty minutes until it thickens to a syrupy consistency that coats the back of a spoon.
- Cut the sponge into squares:
- Using a serrated knife, trim the edges if they are dark or crispy, then cut the sponge into twenty-four even squares, wiping your blade between cuts for clean sides.
- Whip the filling:
- Beat the thickened cream with icing sugar and vanilla until it holds firm peaks that stand upright when you lift the beaters, stopping just before it looks grainy or starts to split.
- Sandwich with cream:
- Place twelve sponge squares on your work surface and dollop a generous spoonful of whipped cream onto each one, then gently press a second square on top to create twelve little sponge sandwiches.
- Dip in jelly:
- Working quickly with two forks, lower each sandwiched cake into the semi-set jelly, rolling it to coat all four sides, then hold it above the dish for a few seconds to let the excess drip back.
- Roll in coconut:
- Immediately transfer each jelly-coated cake into the desiccated coconut and roll it around until every sticky surface is covered, then set it on a wire rack to firm up.
- Chill before serving:
- Refrigerate the finished cakes for at least thirty minutes so the jelly sets fully and the coconut adheres, giving you clean, pretty little squares that hold their shape when you pick them up.
 Save to Pinterest
 The first time I brought a tray of these to a friend's barbecue, three people asked for the recipe before they even finished eating theirs, and one woman told me it transported her straight back to her childhood kitchen in Melbourne.
Choosing the Right Jelly Flavor
Raspberry is the classic choice and produces that beautiful blush pink everyone expects, but I have used passionfruit jelly for a tropical twist that worked wonderfully at a summer birthday party.
Getting the Sponge Texture Right
The sponge should feel light and slightly springy, almost like touching a cloud, and if you find it is browning too quickly in your oven, lay a sheet of foil loosely over the top during the last few minutes of baking.
Serving and Storing Your Jelly Cakes
Arrange them on a pretty plate with a pot of strong tea and watch how people gravitate toward them before anything else on the table.
- Keep them refrigerated in a single layer in an airtight container if you need to make them a few hours ahead.
- Do not stack them or the coconut and jelly will stick together and tear when you pull them apart.
- Always let them sit at room temperature for ten minutes before serving so the cream softens slightly and the flavors bloom.
 Save to Pinterest
 These little cakes are a labor of love that reward every minute of effort with pure, joyful eating. Share them generously because that is exactly what my grandmother would have done.
Recipe Questions & Answers
- → How long should the sponge be baked?
-
Bake at 180°C (350°F) for 12–15 minutes in a lined 20cm x 30cm tin. A skewer should come out clean; avoid overbaking so the sponge remains soft enough for sandwiching.
- → How do I get the jelly to the right consistency for dipping?
-
Dissolve the jelly crystals in boiling water, stir in cold water, then refrigerate in a shallow dish. Check after 45–60 minutes; the surface should be tacky and slightly thickened but still pourable for coating.
- → What’s the best way to prevent soggy cakes when coating?
-
Work with the jelly at a semi-set stage so it clings without saturating. Allow excess to drip off on a wire rack before rolling in coconut, and keep movements gentle when dipping.
- → Can I make a dairy-free version?
-
Yes — swap thickened cream for whipped coconut cream and use dairy-free margarine in the sponge. The texture will be slightly different but still delicious.
- → How long can the finished cakes be stored?
-
Best eaten the day they are made. Store chilled in a single layer for up to 24 hours; coconut coating may soften over time, so avoid long storage.
- → What flavor variations work well with this method?
-
Passionfruit or orange jelly are excellent alternatives to raspberry. You can also fold a little zest into the sponge or add a thin layer of jam for extra fruit intensity.
